Tag: Lot Calculator

  • Fixed % vs Fixed $ Risk — Which Actually Works?

    Education · Risk Management · 9 min read

    Open any trading book and the advice on position sizing splits into two camps. Camp one says “risk a fixed percentage of your account on every trade”. Camp two says “risk a fixed dollar amount”. Both have advocates with track records. Both sound reasonable. But under different account conditions, one of them will quietly destroy you while the other lets you compound.

    The right answer is not “always pick one.” The right answer is knowing which method matches your account size, your strategy, and the phase of your trading career you are in.

    The Short Answer

    Fixed % is mathematically superior for compounding accounts above $10k. Fixed $ is more practical for very small accounts and for prop firm challenges with strict daily loss caps. Most traders should use fixed % with a hard dollar ceiling — the best of both worlds.

    How Each Method Actually Works

    Before debating which is better, let us define exactly what each one does on a real trade.

    Fixed Percentage Risk

    You decide on a percent of your account to risk per trade — say 1%. The actual dollar risk recalculates with every change in account balance. After winners, your dollar risk grows. After losers, it shrinks.

    Account: $10,000 · 1% risk = $100 per trade

    Account grows to $15,000 · 1% risk = $150 per trade

    Account drops to $8,000 · 1% risk = $80 per trade

    Fixed Dollar Risk

    You decide on an exact dollar amount to risk per trade — say $100 — and you keep that amount constant regardless of what happens to the account.

    Account: $10,000 · fixed $100 = 1.0% risk

    Account grows to $15,000 · fixed $100 = 0.67% risk

    Account drops to $8,000 · fixed $100 = 1.25% risk

    Notice the asymmetry: with fixed $, your effective risk percentage grows when the account shrinks. This is the core danger of fixed dollar sizing — and the core advantage of fixed percentage sizing.

    The Compounding Argument for Fixed %

    Fixed % wins the math contest hands down. Imagine two traders with $10,000 accounts, both running a strategy that produces 100 trades per year with a 60% win rate and 1:1 R:R. Both risk $100 per trade in absolute terms at the start of year one.

    After year one, both accounts are at $12,000 (60 wins minus 40 losses, net +$2,000). Now what happens in year two?

    YEAR 2 — STARTING AT $12,000

    Trader A (1% fixed) → risks $120/trade → ends year at $14,400

    Trader B ($100 fixed) → risks $100/trade → ends year at $14,000

    A 2.8% advantage in year two. Repeat this for ten years and Trader A is significantly ahead — not because their strategy is better, but because their risk grew with their winnings. Compounding only works if your bet size scales with your bankroll.

    The opposite case is more painful. If both traders have a bad year and end down at $8,000, Trader A automatically risks less ($80/trade) for year two — which protects them. Trader B keeps risking $100/trade, which is now 1.25% of a smaller account. If the bad year continues, Trader B accelerates toward zero while Trader A decelerates.

    When Fixed Dollar Actually Wins

    If fixed % is mathematically dominant, why does anyone still use fixed $? Because in three specific situations it is genuinely the better choice.

    1. Very Small Accounts

    On a $500 account, 1% risk is $5. Many brokers have minimum lot sizes that make $5 risk impossible to achieve precisely — you end up either over-risking (the next-step-up lot size risks $8 or $12) or unable to take the trade at all. Fixed dollar sizing lets you set a workable risk amount that matches what your broker will actually accept.

    2. Prop Firm Challenges with Daily Loss Caps

    Most prop firms (FTMO, MyForexFunds, etc.) impose a hard daily loss limit — often 4% or 5% of starting balance. With fixed % sizing, your dollar risk per trade compounds along with profits during a winning streak inside the day, which can push you over the daily cap faster than expected. Fixed dollar sizing keeps your daily exposure mathematically capped: 4 trades at $200 risk = $800 max daily loss, locked.

    3. Strategies with Variable Win Quality

    If your strategy has clearly defined “A-grade” and “B-grade” setups (think: trades meeting all your criteria vs trades meeting most), fixed dollar sizing per grade is cleaner than constantly recalculating percentages. You might risk $200 on every A-setup and $100 on every B-setup, regardless of account size. This makes performance review much easier — you can immediately see which grade is actually profitable.

    Reality Check

    Fixed dollar is also psychologically easier when the account is in drawdown. It is harder to take a trade when “1% of my account” keeps getting smaller and feels like surrender. A constant dollar amount feels more like business-as-usual.

    The Hybrid Approach Most Traders Should Use

    In practice, the smartest setup combines both. Here is the rule that experienced traders converge on after a few years:

    Risk = MIN(account x 1%, fixed $ ceiling)

    Translation: risk 1% of your account per trade, but never more than a hard dollar ceiling you set in advance. For example: 1% of account, capped at $500 per trade.

    Why this works:

    • Below the ceiling, you get the compounding benefit of fixed % — your risk grows with the account, your wins grow proportionally.
    • Above the ceiling, your absolute dollar risk stops growing. This protects you from a single trade becoming psychologically too large to manage rationally — a real problem once accounts cross six figures.
    • In drawdown, fixed % automatically reduces your absolute risk — so you decelerate naturally when things go wrong.

    Most traders start with pure fixed % (1% or 0.5%) and add the dollar ceiling later when their account grows large enough that risking the full % per trade starts feeling uncomfortable.

    The Mistake That Kills Both Methods

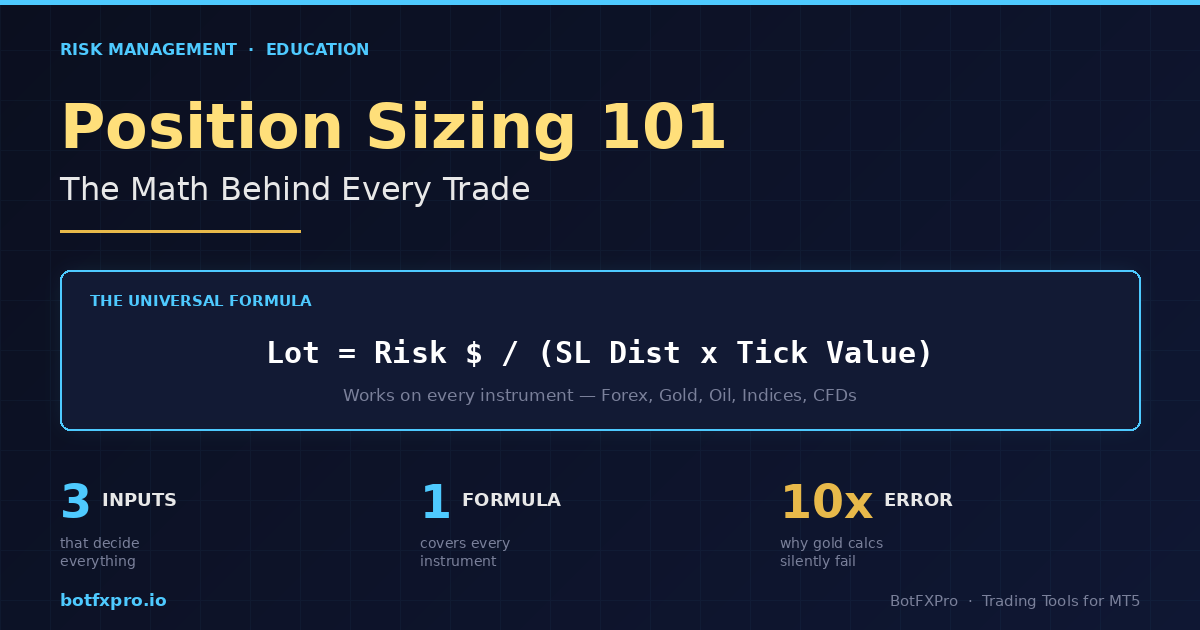
    Whether you use fixed % or fixed $, both methods break the moment you start trading instruments where your lot size calculation is silently wrong.

    A trader can set their system to “1% per trade” and feel disciplined. But if they switch from EURUSD to gold and apply the same lot size mental math, they may actually be risking 5% or 10% — and they will not notice until the equity curve confirms it. The same problem hits fixed dollar traders: “I always risk $100” sounds disciplined, but if your gold trade is actually risking $700 because the tick value math went wrong, the discipline is illusion.

    This is why both methods only work when paired with automated lot calculation that reads the instrument’s real Tick Size and Tick Value. Without that, you are picking between two methods that will both lie to you about how much you are actually risking.

    Common Trap

    Switching between fixed % and fixed $ midway through a losing streak. This is almost always emotional, not strategic — traders move to fixed $ during drawdowns to “stop the bleeding from getting smaller” and then back to fixed % during recoveries. Pick one method, write it down, and only change it after a 100-trade review — never mid-streak.

    Choosing What Fits Your Account Today

    A practical decision tree for traders who want a clear answer right now:

    • Account under $1,000: Fixed dollar — broker lot minimums make % sizing impractical.
    • Account $1,000-$10,000: Fixed % at 0.5%-1% — small enough to compound meaningfully, large enough to absorb a 10-trade losing streak.
    • Account $10,000-$100,000: Fixed % at 1% — this is the sweet spot where compounding compounds and drawdown protection kicks in automatically.
    • Account above $100,000: Fixed % with dollar ceiling — set the ceiling at whatever absolute loss feels manageable per trade.
    • Prop firm challenges: Fixed dollar at the level that keeps your worst-day-loss safely below the daily cap, regardless of how many trades you take.

    Making the Method Match the Math

    Whichever method you pick, the calculation needs to happen automatically before every single trade. Manual recalculation is where the system breaks — markets move fast, you skip a step, and the next thing you know your “1%” trade is actually risking 4% because you eyeballed the lot size.

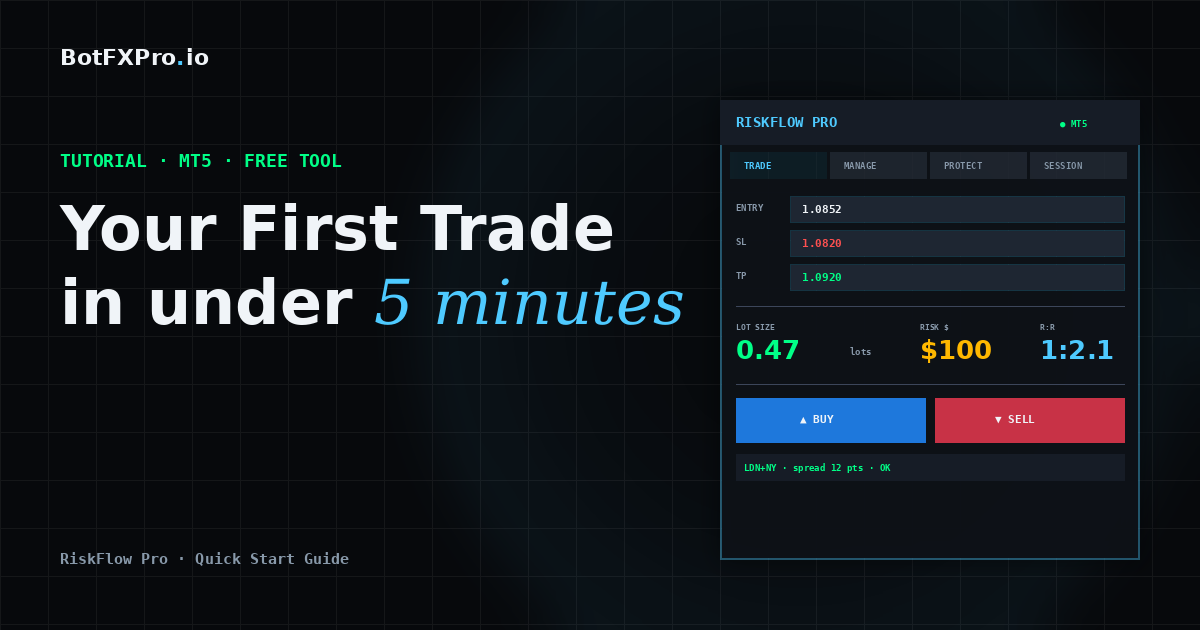
    A proper trading dashboard handles this in real time: you set your method (% or $), enter your stop loss, and the platform reads the instrument’s real Tick Value to calculate the correct lot size instantly. No mental gymnastics, no broker-specific lookup tables, no silent over-risking on gold and indices.

    RiskFlow Pro supports four risk modes — % Balance, % Equity, Fixed $, and % Free Margin — and switches between them with one click. Whichever method you decide fits your account today, you can run it without recalculating anything by hand.

    For a deeper look at the four risk modes, the daily drawdown protection, and the multi-level partial close that pairs naturally with fixed % sizing, the Advanced Features guide walks through each setting in detail with real examples — especially useful if you are running prop firm challenges where the choice between % and $ sizing has direct rule-compliance implications.

    Key Takeaways

    • Fixed % wins the long-term compounding contest — your bet size scales with the bankroll, both up and down.
    • Fixed $ wins for very small accounts, prop firm challenges with daily caps, and graded-setup strategies.
    • The hybrid “fixed % capped at a dollar ceiling” gives most traders the best of both above $50k.
    • Both methods break silently when applied to instruments where lot sizing math is wrong — gold, oil, indices, CFDs.
    • Never switch methods mid-streak. Lock the choice in writing and review only every 100 trades.

    Get RiskFlow Pro

    Switch between four risk modes with one click.

    % Balance, % Equity, Fixed $, % Free Margin — all calculated correctly on any instrument, any broker.

    Download Free on MQL5 →

    For prop firm setups and the four risk modes in detail, see the Advanced Features Guide.

  • Position Sizing 101: The Math Behind Every Trade

    Position Sizing 101: The Math Behind Every Trade

    Education · Risk Management · 10 min read

    Most traders who blow up their accounts do not lose because their strategy is bad. They lose because their position sizes are wrong. One trade too big, one stop too wide, one missed calculation on a non-standard instrument — and months of gains disappear in an afternoon.

    The good news: position sizing is math, not magic. Once you understand the formula and the three numbers that feed it, you can size any trade on any instrument correctly, every single time. This guide walks through it from first principles.

    What You Will Learn

    The one formula that works for every instrument, how to calculate each input, why gold and indices break naive lot calculators, and how to get the math right in under 5 seconds per trade.

    The Universal Position Sizing Formula

    Every correct lot size calculation reduces to a single equation. No matter what you trade — Forex, gold, oil, indices, crypto — the formula does not change:

    Lot Size = Risk $ ÷ (SL Distance × Value Per Point Per Lot)

    Three inputs. That is it. If you know how many dollars you are willing to lose on this trade, how far your stop loss sits from your entry, and how much money each point of price movement costs you on one lot — you have the answer.

    The reason traders mess this up is not the formula. It is getting those three inputs right, especially the third one. Let us break each of them down.

    Input 1 — Your Risk Amount in Dollars

    This is the easiest one. Pick your risk percentage, multiply by your account balance.

    If your balance is $10,000 and you risk 1% per trade, your risk amount is $100. That is the maximum dollar loss you will accept if this trade hits your stop loss.

    How much should the percentage be? Most professional traders and prop firm rules sit somewhere between 0.5% and 2% per trade. Below that and winners barely move your account. Above that and a normal losing streak wipes you out.

    Quick Reference

    A string of 5 consecutive losses at 1% risk drops your account 4.9%. The same 5 losses at 5% risk drops it 22.6%. This is why small percentages matter.

    Input 2 — Stop Loss Distance

    This is the distance between your entry price and your stop loss price, measured in the instrument’s smallest unit of movement. On EURUSD, that unit is typically a pip. On XAUUSD (gold), it is usually $0.01 or $0.10 depending on broker. On US30, it is 1 index point.

    The critical thing: your stop loss distance is determined by your chart analysis, not by what lot size you want to trade. If the correct technical stop is 50 pips away, that is your stop — you do not tighten it to 10 pips just to trade bigger. Tight arbitrary stops are a direct path to account death.

    Worked example on EURUSD:

    • Entry: 1.0850
    • Stop loss: 1.0820 (just below a swing low)
    • Distance: 30 pips

    Input 3 — Value Per Point Per Lot (The One People Get Wrong)

    This is where naive lot calculators — and a lot of traders — go completely off the rails. The value per point depends on the instrument, and it is not the same across your watchlist.

    For standard Forex pairs, the math is familiar:

    • 1 standard lot = 100,000 units of the base currency
    • On EURUSD, 1 pip on 1 standard lot ≈ $10
    • On GBPUSD, same — ≈ $10 per pip per standard lot
    • On USDJPY, close to $10 but varies with the USDJPY rate itself

    Plug those numbers into our formula with the EURUSD example:

    Risk $: $100

    SL distance: 30 pips

    Value per pip per lot: $10

    Lot = 100 ÷ (30 × 10) = 0.33 lots

    So a correct 1%-risk trade on a 30-pip stop at $10,000 balance is 0.33 lots. Not 1 lot. Not 0.1 lots. The math is precise.

    Why Gold, Indices, and Oil Break Naive Calculators

    This is the part that trips up traders — and where most free online lot calculators fail silently.

    On XAUUSD (gold), a “pip” is not well-defined. Different brokers quote gold with 2, 3, or even 4 decimal places. The contract size also varies — some brokers use 100 oz per lot, others use 10 oz. If you assume $10 per “pip” like on EURUSD, your risk calculation could be off by 10x.

    On US30 or NAS100 CFDs, one index point might be worth $1 per lot on one broker and $0.10 on another. Oil (Brent, WTI) is similar — contract sizes and tick values are broker-specific.

    The fix: stop thinking in pips for these instruments. Use Tick Size and Tick Value — two values your broker publishes for every instrument, and that MT5 exposes directly:

    • Tick Size — the smallest price increment (e.g. 0.01 for gold, 1.0 for US30)
    • Tick Value — the dollar value of one tick on one standard lot (e.g. $1 on gold at 100 oz lot size)

    The universal formula rewritten in these terms:

    Lot = Risk $ ÷ ((SL distance ÷ Tick Size) × Tick Value)

    This works for everything. Gold, oil, crypto CFDs, DXY, US30, Bitcoin — every instrument has a published Tick Size and Tick Value, so you just plug them in.

    Common Mistake

    Using a “gold pip calculator” from a website that assumes $1 per pip per mini lot. On a broker that uses 10-oz contracts with 2-decimal pricing, this can under-size your position by 10x — meaning your “1% risk” trade is actually risking 0.1%. The opposite error (over-sizing by 10x) blows accounts in a single trade.

    Worked Example on Gold

    Suppose your broker quotes XAUUSD with 2 decimal places (tick size 0.01), 100-oz contracts, and a tick value of $1 per tick per standard lot. You want to buy gold at 2650.00 with a stop at 2645.00 — a 5-dollar move, which is 500 ticks.

    Balance: $10,000 · Risk 1% → Risk $ = $100

    SL distance: 5.00 ÷ 0.01 = 500 ticks

    Tick value per lot: $1

    Lot = 100 ÷ (500 × 1) = 0.20 lots

    0.20 lots of gold at a 500-tick stop risks exactly $100. Every time.

    Sanity Checks Every Trader Should Run

    Before you click BUY or SELL, run these three quick checks:

    1. Is the risk dollar amount right? If your 1% risk shows as $1,000 when your account is $10k, something is off by 10x.
    2. Is the margin required reasonable? A calculated lot that requires more margin than your free margin means the position will be rejected — you need to either lower risk % or take a tighter stop.
    3. Does the lot round to the broker’s minimum step? If the formula says 0.347 lots but the broker only accepts 0.01 increments, round down to 0.34 — never up.

    The Shortcut — Automate the Math

    Doing this calculation by hand before every trade is slow and error-prone. When markets move fast, you skip the math — and that is exactly when wrong lot sizes get entered.

    The solution is to let MT5 itself handle the calculation. Every instrument in MT5 exposes its Tick Size and Tick Value through the broker’s symbol specification, so a well-written EA can read those values directly and output the correct lot size in real time — no guesswork, no broker-specific table lookups, no pip-vs-tick confusion.

    This is exactly what RiskFlow Pro does. You enter your risk %, your entry, and your stop — it reads the instrument’s real Tick Size and Tick Value from your broker and gives you the correct lot size instantly. Works on Forex, gold, oil, indices, crypto CFDs, whatever your broker offers.

    If you are new to the tool, the Quick Start guide walks you from download to your first properly-sized trade in under 5 minutes. It is free on MQL5 and works on any broker account.

    Practical Tip

    Even if you use an automated calculator, do the manual math on paper for the first 5 trades of any new instrument. This builds intuition for what “correct” looks like and helps you spot calculator errors before they hurt you.

    Key Takeaways

    • Position size is math, not opinion. One formula covers every instrument.
    • For Forex pairs, pip value thinking works. For gold, indices, oil, and CFDs, use Tick Size and Tick Value instead.
    • Your stop distance comes from chart analysis, not from what lot size feels good. Size the position to fit the stop — never the reverse.
    • Automating the math removes the single most common cause of retail blowups: wrong lot size on non-standard instruments.

    Get RiskFlow Pro

    Stop calculating lot size by hand.

    Free MT5 dashboard that does the math for you — on any instrument, any broker.

    Download Free on MQL5 →

    Or read the Quick Start Guide first — you will be trading properly-sized positions in under 5 minutes.

  • RiskFlow Pro Quick Start: Your First Trade in Under 5 Minutes

    RiskFlow Pro Quick Start: Your First Trade in Under 5 Minutes

    Tutorial · MT5 · Free Tools · 8 min read

    You just downloaded RiskFlow Pro from MQL5. Maybe you are tired of opening Excel every time you want to calculate lot size. Maybe you blew a prop firm challenge last week because you forgot to move your stop to breakeven. Maybe you just want a cleaner way to trade manually.

    Whatever brought you here, this guide gets you from zero to your first properly-sized trade in under 5 minutes. No fluff, no backstory on why risk management matters. Let us just get the thing running.

    What You Will Have By The End

    A working RiskFlow Pro dashboard on your chart, your personal risk settings dialed in, and one practice trade placed correctly with a calculated lot size.

    Before You Start

    Make sure you have these three things ready:

    • MetaTrader 5 installed and logged into a broker account. A demo account works fine for practice.
    • RiskFlow Pro downloaded from the MQL5 Market. If you have not downloaded it yet, grab it at the link at the bottom of this article.
    • Algo Trading enabled in MT5. Check the top toolbar — the Algo Trading button should be green, not red.

    Step 1 — Attach RiskFlow Pro to a Chart

    1. Open any chart you want to trade on. Gold, EURUSD, US30, whatever you usually trade. The timeframe does not matter — the EA works on any timeframe.
    2. In the MT5 Navigator panel (left side), expand the Expert Advisors folder. You will see RiskFlow Pro there.
    3. Drag RiskFlow Pro onto your chart. A settings window will pop up.
    4. In that window, make sure Allow Algo Trading is checked. You do not need to check Allow modification of Signals settings — that is unrelated.
    5. Click OK.

    You should now see a dashboard appear in the top-left corner of your chart. Six tabs across the top: Trade, Manage, Session, Protect, Settings, and Journal. The smiley face in the top-right corner of MT5 should be there too, confirming the EA is running.

    Troubleshooting

    If you do not see the dashboard, check that Algo Trading is actually enabled (the button in the MT5 toolbar should be green). If the dashboard shows but looks cut off, drag it to a less crowded part of your chart.

    Step 2 — Set Your Risk Profile

    This is the most important step. You only need to do it once, then the EA remembers.

    1. Click the Settings tab on the dashboard.
    2. You will see a Risk Type button at the top. Click it to cycle through four options:
      • % Balance — Risk a percentage of your total account balance. Most common choice.
      • % Equity — Risk a percentage of current equity. Useful with many open positions.
      • Fixed $ — Risk a fixed dollar amount every trade.
      • % Free Margin — Risk a percentage of available margin.
    3. In the Value field, enter your number. For example, if you chose % Balance and want to risk 1% per trade, type 1.0.
    4. Set your R:R Ratio. This is how RiskFlow Pro auto-calculates your take profit. For example, 2.0 means your take profit will be set at 2x your risk distance. Leave blank if you prefer to set TP manually.

    That is it for setup. The EA now knows exactly how to size every trade you make going forward.

    Step 3 — Place Your First Trade

    Go back to the Trade tab. You have two ways to enter a trade — pick the one that fits your style.

    Method A: The Simple Way (Market Order)

    1. Click the MARKET button. It turns green.
    2. In the SL field, type your stop loss price. For example, if gold is at 2650 and you want to stop out at 2645, type 2645.00.
    3. Leave TP blank (RiskFlow Pro will auto-calculate from your R:R ratio) or type a specific TP price.
    4. Look at the Lot display. It shows the exact lot size calculated from your risk settings and SL distance. Also check Margin — green means you have enough, red means your risk setting is too high for your account.
    5. Click BUY or SELL. Order goes through at market price.

    Method B: The Visual Way (Drag Lines)

    This is where RiskFlow Pro shines. If you have ever wanted to just drag your SL and TP around on the chart and see your lot size update live, this is for you.

    1. Click the LINES button. It turns green.
    2. Three colored lines appear on your chart: blue (Entry), red dashed (Stop Loss), green dashed (Take Profit).
    3. Drag any line to the level you want. The dashboard updates everything in real time — lot size, R:R ratio, margin, and order type.
    4. When you like what you see, click BUY or SELL.

    That is your first properly-sized trade. The blue, red, and green lines stay on your chart until the position closes, so you always know your levels at a glance.

    Step 4 — Let the EA Manage the Trade

    This is the part most traders skip, and it is also the part that separates profitable traders from the rest. Click the Manage tab.

    For your first trade, turn on just one thing: Breakeven.

    1. Toggle the BE button to ON. It turns green.
    2. Set Trigger R to 1.0. This means when price moves 1x your risk distance in your favor, the EA will move your stop loss to your entry price automatically.
    3. Set Offset pips to 2.0. This adds a small buffer so your stop sits just above (or below) entry — making breakeven actually a small profit to cover spread.

    Now walk away. When the trade works out, your stop moves to breakeven automatically. When it does not, your original SL protects you.

    Why This Matters

    This one setting alone will change your trading. No more “I should have moved my stop” regrets after a winner turns into a loser.

    Step 5 — Bonus: Turn On Prop Firm Protection

    If you are running an FTMO or other prop firm challenge, this takes 30 seconds and can save your entire account.

    1. Click the Protect tab.
    2. Toggle Daily DD Limit to ON.
    3. Click the DD Type button and set it to FTMO Rel (or whichever method your prop firm uses).
    4. Set the limit value. For FTMO, enter 4.0 for the 4% daily drawdown limit, or 4.5 if you want a small buffer.

    Done. The EA now watches your equity every tick. If you ever get close to the daily drawdown limit, new trades are blocked automatically. The floor line even shows you how much you have left to lose before the limit triggers.

    What to Do Next

    You have the basics working. That alone already makes you faster and safer than 80% of manual traders.

    If you want to go deeper — trailing stops, partial closes at multiple levels, OCO pending orders, virtual SL/TP stealth mode, and the full trade journal — the Advanced Features guide covers every tab in detail with real trading examples.

    Want alerts pushed to your phone when trades hit breakeven or your daily drawdown limit triggers? The MT5 notifications setup guide walks through push and email alerts end to end.

    Get RiskFlow Pro

    Free for the First 500 Downloads

    A professional manual trading dashboard. Position sizing, trade management, and FTMO risk protection — all in one compact panel on your chart.

    Download Free on MQL5 →

    Works on any MT5 broker account · No registration on our site required

    Found this guide useful? Leave a rating or comment on MQL5 — it helps other traders discover RiskFlow Pro, and helps me prioritize which features to add next.