Tag: MT5

  • Why Win Rate Is the Wrong Metric (And What to Track Instead)

    Education · Performance Metrics · 9 min read

    Walk into any trading group and the first question someone asks a new strategy is: “What’s your win rate?” The next question is usually never asked, even though it matters more: “What does your distribution of winners and losers look like?”

    Win rate is the metric retail traders obsess over because it is easy to understand and emotionally satisfying. A 70% win rate sounds great. A 40% win rate sounds bad. The problem is that a 70% win rate strategy can lose money for years while a 40% win rate strategy can compound into a fortune. The single number tells you almost nothing about whether the strategy actually works.

    If you have ever followed a “high win rate” signal service and watched your equity curve drift sideways or down despite “winning more than half the trades,” you have already experienced this firsthand. The math behind why this happens is straightforward — and once you see it, you stop caring about win rate the way most retail traders do.

    The Core Insight

    Win rate is one input to expectancy. The other inputs — average winner size, average loser size, and tail behavior — usually matter more. Optimizing for win rate alone is one of the fastest ways to ruin a profitable strategy.

    The 70% Win Rate That Loses Money

    Let’s make this concrete with two strategies.

    Strategy A is a “scalping” approach with tight stops and modest targets. It wins 70% of the time. Each winner makes +0.5R; each loser costs -1R (because slippage and tight stops mean losers tend to slightly exceed the planned loss).

    Strategy B is a trend-following approach. It wins 40% of the time. Each winner runs +3R; each loser costs -1R as designed.

    100 TRADES — SAME ACCOUNT

    Strategy A (70% WR, +0.5R win, -1R loss)

    70 wins x +0.5R + 30 loss x -1R = 5R

    Net: +5R per 100 trades

    Strategy B (40% WR, +3R win, -1R loss)

    40 wins x +3R + 60 loss x -1R = 60R

    Net: +60R per 100 trades (12x better)

    The “boring” 40% win rate strategy outperforms the “great” 70% win rate strategy by 12x. The math has nothing to do with which is harder to trade or which has a better signal — it has everything to do with how the wins and losses are sized.

    Now factor in the trading costs covered in the previous article on spread, slippage, and commission: Strategy A pays 100 round-trips of cost on a tiny edge per trade. Strategy B pays 100 round-trips on a much larger edge per trade. After realistic transaction costs, Strategy A often turns negative while Strategy B is barely affected.

    The Metric That Actually Matters: Expectancy

    Expectancy is the expected value of each trade in R-multiples — and it is the only metric that determines whether a strategy makes money over time. The formula:

    Expectancy = (WR x avg win) – ((1-WR) x avg loss)

    Working through the same examples in expectancy terms:

    • Strategy A: (0.70 x 0.5R) – (0.30 x 1R) = 0.35R – 0.30R = +0.05R per trade
    • Strategy B: (0.40 x 3R) – (0.60 x 1R) = 1.20R – 0.60R = +0.60R per trade

    Strategy B has 12x the expectancy per trade. That is why it produces 12x the equity growth over time.

    A strategy is only worth trading if expectancy is meaningfully positive after costs. Win rate is just one term in the formula — and not even the most important one when you look at the multiplicative weight of average winner size.

    Why Win Rate Misleads So Powerfully

    If win rate is mathematically less important than expectancy, why does almost every retail trader optimize for it? Three reasons, all psychological rather than mathematical.

    1. Wins Feel Like Skill, Losses Feel Like Failure

    Each individual win produces a small dopamine hit; each loss produces a small sting. Over hundreds of trades, the brain naturally seeks to maximize the win count to maximize the emotional reward — even when this is mathematically destructive. A 40% win rate strategy means more than half your trades feel like failures, even when the strategy is highly profitable. Most traders cannot tolerate that emotionally and switch to higher-WR strategies that pay them less.

    2. Win Rate Is Visible. Expectancy Isn’t.

    After 50 trades, you know your win rate to within a few percentage points. After 50 trades, your expectancy estimate has wide enough error bars that it could be anywhere from +0.1R to +0.6R — you cannot tell. Win rate stabilizes much faster than expectancy on small sample sizes, which makes it feel more reliable even though the bigger number is the one driving your equity curve.

    3. Marketing Optimizes for Win Rate

    Signal services, course sellers, and brokers all promote strategies by their win rate because it is the metric that closes sales. “85% win rate!” sells. “+0.4R expectancy after costs!” doesn’t. Once a trader has internalized the marketing framing, breaking out of it requires a paradigm shift, not just new information.

    The Tell

    When a strategy’s marketing leads with win rate but does not mention average winner-to-loser ratio, you can be reasonably confident the average winner is small relative to the average loser. High win rate plus undisclosed R-ratio almost always means a strategy with positive trade count but neutral or negative expectancy.

    The Five Metrics That Actually Tell You If a Strategy Works

    If win rate is not the right metric, what is? There are five numbers that, taken together, give you a complete picture of strategy quality.

    1. Expectancy in R

    The single most important number. Calculated from win rate, avg winner, and avg loser. Anything above +0.3R per trade after costs is generally tradeable; below +0.1R you are mostly paying transaction costs to move money around.

    2. Average R Per Trade Distribution (Not Just Average)

    Two strategies with identical average winners can have completely different distributions. One might have steady +1.5R wins; the other might have many small +0.5R wins balanced by occasional +5R outliers. The second strategy has higher variance — and more importantly, more reliance on those outliers existing. Look at the distribution shape, not just the mean.

    3. Maximum Consecutive Losing Streak

    A strategy with 40% win rate will produce a 7-loss streak roughly once every 130 trades. A strategy with 60% win rate will see a 5-loss streak about once every 80 trades. If your position sizing cannot survive your strategy’s expected worst streak, you will fail before the math has time to play out — even if expectancy is strongly positive. This connects directly to the Position Sizing 101 framework: your risk-per-trade must be small enough that the worst expected streak does not break the account.

    4. Max Drawdown (in R or %)

    The biggest peak-to-trough equity decline the strategy has produced historically. This number tells you what level of pain the strategy will demand from you to follow it during bad periods. If max drawdown is 25% in R-terms but you cannot psychologically tolerate 15% drawdowns, the strategy is wrong for you regardless of expectancy. The math of why drawdowns hurt more than equivalent profits help is covered in detail in The Drawdown Math Every Prop Firm Trader Should Know.

    5. Recovery Factor (Total Profit / Max Drawdown)

    A single number that captures how efficiently the strategy generates profit relative to the pain it inflicts. Recovery factor below 2 means the strategy produces less than 2x its maximum drawdown over the test period — barely worth trading. Above 5 is a strong strategy. Above 10 is exceptional and probably overfit unless tested on long enough samples. Recovery factor lets you compare strategies that have very different scales fairly.

    THE STRATEGY HEALTH CHECKLIST

    Expectancy : > +0.3R per trade after costs

    Win rate : irrelevant on its own

    Worst streak : matches risk-per-trade math

    Max drawdown : within your tolerance

    Recovery factor : > 3 ideally

    When High Win Rate Actually Indicates a Problem

    There is a specific signature that should make you suspicious of any strategy: very high win rate combined with very low average winner. This is not “tight risk management.” It is usually one of three things:

    1. Hidden Martingale

    “95% win rate” strategies are usually averaging-down systems that hold losers indefinitely while booking small frequent winners. The win rate is real — every closed trade was a winner. The problem is that the open losers, when they finally close, wipe out months of accumulated winnings in a single event. Win rate looks great until the day it doesn’t.

    2. Asymmetric Stops

    A strategy with no stop loss and tight take-profit shows a high win rate because losers are allowed to run while winners get cut. The math is structurally guaranteed to lose: you are letting losers grow and capping winners. The win rate is high because you are taking the small wins; the equity curve dies because the occasional large losers undo everything.

    3. Survivorship Bias in Backtest

    If a strategy was developed on the same data it was backtested on, the high win rate is partially overfitting noise. The same strategy on out-of-sample data typically produces a much lower win rate because the patterns it locked onto were specific to the development period. Anyone selling a strategy whose published win rate is dramatically higher than typical for that style of trading is almost certainly showing you optimized historical numbers.

    The Sanity Check

    For any strategy claiming above 75% win rate, ask three questions: What is the maximum loss the strategy has ever taken? What is the average winner-to-loser ratio? Does the strategy use stop losses on every trade? If you cannot get clear answers to all three, the win rate number is meaningless.

    How Trade Management Affects These Metrics

    Most retail traders think their performance metrics are determined by their entries. The reality is that trade management — partial closes, breakeven moves, trailing stops — usually has more impact on the final numbers than where you got in.

    A trader using aggressive partial closes will see win rate increase (more positions exit at small wins) but average winner shrink dramatically. The net expectancy almost always drops, even though the strategy “feels safer.” This is the trade-off discussed in detail in Partial Close: Where to Set Each Level — the partial close structure that maximizes win rate is usually not the structure that maximizes expectancy.

    When you change a trade management rule, the right way to evaluate the change is to recompute expectancy on a backtest with and without it — not to ask “did my win rate go up?”. Win rate going up is often the sign of an expectancy decrease, not improvement.

    Practical Tracking Setup

    For an individual trader, the minimum viable performance tracking system needs five fields per trade and one calculated rollup:

    • Per trade: instrument, entry, stop, exit, lots
    • Calculated: R-multiple = (exit – entry) / (entry – stop) for longs, or the opposite sign for shorts
    • Rolling stats: last 50 trades expectancy, last 100 trades expectancy, max consecutive losses, current drawdown from peak

    Notice that win rate is not in the list. You can derive it from the data if you want, but it should not be one of the numbers you stare at every day. The numbers worth watching are expectancy and current drawdown — those tell you whether the strategy is healthy and whether you are inside expected behavior.

    A simple spreadsheet with these fields handles most retail trading. The trick is being honest about what you log — including all costs, including small losers you closed manually before they hit stops, including everything. Selective logging produces stats that look better than reality, which is the entire problem you are trying to solve by tracking properly in the first place.

    Tools That Track the Right Metrics

    Manual journaling is the gold standard but most retail traders abandon it within a few weeks. The next-best option is automated trade logging that captures every closed position with its R-multiple, organizes the data by date and instrument, and exports cleanly so you can compute the metrics that matter.

    RiskFlow Pro includes a Trade Journal tab that captures every closed position automatically with entry, stop, exit, R-multiple, and net result. CSV export means you can pull the full history into a spreadsheet or analytics tool to compute expectancy, drawdown, and recovery factor without reconstructing trade-by-trade from broker statements.

    For the Trade Journal walkthrough, daily drawdown protection that pairs naturally with these metrics, and how the multi-symbol monitor helps catch concentration issues before they show up in your drawdown stats, the Advanced Features guide walks through each tool in detail.

    Key Takeaways

    • Win rate alone tells you almost nothing about whether a strategy is profitable.
    • A 70% win rate with small wins can lose money; a 40% win rate with large winners can compound aggressively.
    • Expectancy in R is the metric that determines whether a strategy makes money over time.
    • Track five things: expectancy, R-distribution, max consecutive losers, max drawdown, recovery factor.
    • Very high win rate plus undisclosed R-ratio is a red flag — usually a martingale, asymmetric stops, or backtest overfitting.
    • Trade management changes that increase win rate often decrease expectancy — evaluate by expectancy, not win count.
    • Automate your trade logging — manual journaling almost always breaks down within weeks.

    Get RiskFlow Pro

    Automatic trade logging. Real metrics, not vanity stats.

    Trade Journal with CSV export, multi-symbol monitor, daily drawdown protection. Free MT5 dashboard, any broker.

    Download Free on MQL5 →

    For the Trade Journal walkthrough, read the Advanced Features Guide.
  • Spread, Slippage, and Commission: The 3% That Quietly Eats Your Edge

    Education · Trading Costs · 9 min read

    A trader runs a backtest on their strategy. Win rate 55%, average winner +1.5R, average loser -1R. The math says expectancy is +0.4R per trade — solid edge. They go live, run 200 trades over six months, and discover their real expectancy is closer to +0.05R per trade. The strategy did not change. The market did not change. So what happened?

    The 35-basis-point per trade gap between backtest and reality is almost always one thing: trading costs that the backtest ignored or modeled wrong. Spread, slippage, and commission compound across every entry and every exit. Over 200 trades, even small per-trade costs eat huge chunks of edge.

    Most retail traders treat costs as a small detail and obsess over entry signals. The math says they have it backwards: a 1-pip improvement in execution typically helps the equity curve more than a 5% improvement in win rate.

    The Core Insight

    Trading costs are paid on every trade, win or lose. They do not respect your edge or your discipline — they show up the same regardless of whether the trade was a perfect setup or a bad impulse. Over a year of trading, costs are usually the second-largest determinant of your equity curve, right after position sizing.

    The Three Cost Components

    Every retail trade has three separate costs that combine into total transaction expense. Most traders look at one and ignore the other two — which is why their backtests do not match live results.

    1. Spread

    The gap between bid and ask price. Every trade you open immediately starts in negative territory by exactly the spread amount, because you bought at the ask and you can only sell at the bid (or the opposite for shorts). Spread is usually quoted in pips: a 1-pip spread on EURUSD means every trade starts -1 pip down before any market movement.

    Spread is not constant. It widens during low-liquidity hours (Asian session for European pairs), during news releases, and on Sunday open. Typical patterns:

    TYPICAL SPREAD RANGES (RETAIL BROKERS)

    EURUSD London/NY : 0.5 – 1.2 pips

    EURUSD Asian : 1.5 – 2.5 pips

    EURUSD news : 3 – 8 pips (briefly)

    XAUUSD active : 20 – 40 cents

    XAUUSD news : $1 – $5 (briefly)

    2. Slippage

    The difference between the price you wanted and the price you actually got. On stop loss orders especially, slippage can be brutal — your stop is supposed to fire at 1.0850, but the broker fills you at 1.0843 because price gapped through the level on a news spike. That extra 7 pips is pure slippage cost.

    Slippage shows up in two flavors. Negative slippage happens when the price moves against you between order submission and execution — this is the typical case. Positive slippage (price improves) is mathematically possible but rare on retail accounts. The asymmetry means slippage almost always costs you money over time, not the other way around.

    3. Commission

    Direct fee per trade, charged separately from spread. ECN brokers charge low commission (typically $3-7 per round-trip per standard lot) but offer raw spreads near zero. Standard accounts have no commission but wider spreads. The total cost is usually similar — the structure just differs.

    A common trap: traders see “no commission” and assume they are saving money. Often they are paying the same total cost or more, just packaged into spread. The right comparison is total cost per round-trip, not commission alone.

    The Compounding Problem

    Here is what most traders miss: each trade pays the full round-trip cost regardless of outcome. A trade that wins +10 pips with 1-pip spread is really +9 pips of edge. A trade that loses -10 pips with 1-pip spread is really -11 pips of damage. The cost is symmetric on every trade; the edge is not.

    Run this through a high-frequency scalping strategy with average winner +8 pips and 1-pip total transaction cost:

    SCALPING STRATEGY — 200 TRADES

    Backtest expectancy (no costs) : +1.5 pips/trade

    After 1 pip transaction cost : +0.5 pips/trade

    200 trades, no costs : +300 pips

    200 trades, with costs : +100 pips (-67%)

    The strategy “still works” — but two-thirds of the profit went to the broker, not the trader. This is why scalping strategies that look great in backtests often disappoint in live trading: the small edge per trade becomes negligible after transaction costs eat their share.

    Compare to a swing trading strategy with average winner +60 pips and the same 1-pip transaction cost:

    SWING STRATEGY — 50 TRADES

    Backtest expectancy (no costs) : +12 pips/trade

    After 1 pip transaction cost : +11 pips/trade

    50 trades, no costs : +600 pips

    50 trades, with costs : +550 pips (-8%)

    Same 1-pip cost, completely different impact on the equity curve. Lower-frequency, larger-target strategies are cost-resilient. Higher-frequency, smaller-target strategies are cost-fragile. This single fact explains why most retail scalping strategies fail in live trading even when their logic is correct.

    The Hidden Cost — Spread on Stop Loss

    Stop loss orders pay spread implicitly through the bid-ask gap. A long position with a stop at 1.0830 actually fires when the bid hits 1.0830 — which means the ask is around 1.0831. You exit at the bid; you bought at the ask. The 1-pip spread cost is baked into the round-trip whether you notice it or not.

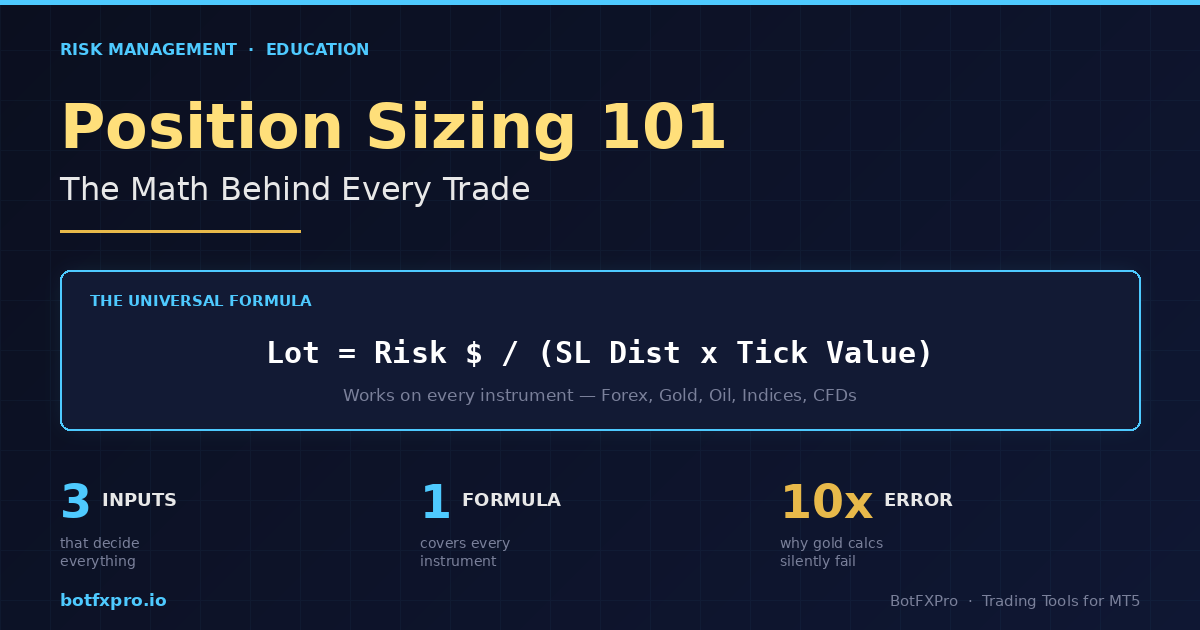
    This matters when you set stops too tight relative to spread. A “10-pip stop” with 2-pip spread is really an 8-pip stop in terms of price movement to trigger — which is a 20% increase in stop-out frequency compared to your intended risk. And critically, this connects directly to lot sizing: as covered in Position Sizing 101, your real risk per trade depends on the actual stop distance, which includes spread.

    For very tight stops on volatile instruments, the spread cost can dominate. A 5-pip stop on EURUSD during a news release with 4-pip spread means you have only 1 pip of actual room before the spread alone closes the trade. The trade is already 80% dead before any market movement.

    When Slippage Becomes Catastrophic

    Spread is predictable. Slippage during normal conditions is small. Slippage during specific events can be account-killing.

    News Spike Slippage

    During major news (NFP, FOMC, CPI), price can gap multiple pips in a single tick. If your stop is in the gap, you do not get the price you set — you get the next available price after the spike. A 10-pip stop on EURUSD during NFP might fill 25-30 pips below your level, turning a 1% risk trade into 2.5-3% loss event.

    Weekend Gap Slippage

    Forex closes Friday and reopens Sunday. If meaningful news breaks over the weekend, the open price may be far from Friday’s close. Your stop is supposed to fire at 1.0850, but EURUSD opens Sunday at 1.0780 — your stop fills 70 pips below intended. This is the same gap risk discussed for breakeven decisions in Breakeven Stops: When to Move, When to Wait — closing positions or moving to breakeven before weekend close avoids the worst of this risk.

    Black Swan Events

    SNB unpegging the franc in 2015, the Brexit vote, the COVID flash crash — when markets gap in ways nobody priced in, slippage can be measured in figures you cannot survive. A 30-pip stop becoming 800-pip slippage. Most retail accounts that blew up during these events did not lose because their analysis was wrong; they lost because slippage exceeded their stop by 20x.

    Practical Defense

    For tail-risk slippage events, the only defense is smaller position size on positions held through scheduled high-impact news or weekends. If your normal trade risks 1%, the same trade through NFP should be sized at 0.3-0.5% to absorb 2-3x slippage and still be a manageable loss.

    The True Cost Calculation

    To know your real expectancy, calculate true cost per round-trip:

    True cost = avg spread + avg slippage + commission per lot

    For a typical EURUSD trade on a standard retail account, that math looks like:

    Avg spread (London/NY) : 1.0 pip

    Avg slippage (per side) : 0.3 pip

    Round-trip slippage : 0.6 pip

    Commission (per lot) : 0 pips equivalent

    True cost per round-trip: ~1.6 pips

    If your strategy’s average winner is 8 pips, your real edge per winner is 6.4 pips after costs — 20% lower than the backtest. If your strategy’s average winner is 50 pips, the real edge per winner is 48.4 pips — 3% lower than the backtest. Same true cost, very different impact.

    Practical Cost Reduction

    Once you understand the math, the levers for reducing costs are clear:

    • Trade liquid sessions only. EURUSD spread during London/NY overlap is 1/3 of Asian session spread. If your strategy works on majors, restricting trading to 13:00-21:00 UTC cuts spread costs by half or more.
    • Avoid scheduled news for entries. Spread widens 5-10x during high-impact releases. Unless you specifically trade news as your edge, opening positions in the 10 minutes before/after major releases is paying significantly more in spread for no reason.
    • Set max-spread filters. Refuse to take trades when current spread exceeds a threshold (e.g., 3x the pair’s normal spread). This automatically blocks news-period entries and Asian-session-on-European-pair traps.
    • Match instrument volatility to stop distance. A 5-pip stop on a pair with 2-pip spread is structurally bad. Either widen stops to give spread room, or trade tighter-spread instruments at that scale.
    • Compare brokers honestly. A “no commission” broker with 1.8-pip spread is more expensive than a commission broker with 0.4-pip spread plus $5 round-trip. Math the total cost, not the headline.

    Tools That Make Cost Tracking Automatic

    Tracking spread in real time, blocking entries when spread exceeds threshold, and adjusting position sizing for current cost conditions — these are all things humans theoretically can do but practically never do consistently. By the time you have checked the spread on the spec sheet, calculated whether it is acceptable, and decided whether to take the trade, the setup has moved.

    A trading platform that displays current spread in real time, refuses to take trades above a max-spread threshold, and accounts for spread in lot size calculations removes the manual tracking step entirely. Costs become a structural part of the trade decision rather than an afterthought.

    RiskFlow Pro shows live spread in points on the dashboard and includes a max-spread filter that blocks new trade entries when current spread exceeds your configured limit. Combined with the multi-symbol monitor, you can see at a glance which instruments are currently tradable and which are in their high-cost period. The lot size calculator also accounts for spread in your stop distance, ensuring your risk math stays accurate even when costs spike.

    For the spread filter setup and how it interacts with the daily drawdown protection during volatile sessions, the Quick Start guide walks through the basic configuration, while the Advanced Features guide covers the deeper integration with session filtering and the four risk modes.

    Key Takeaways

    • Trading costs are paid every trade — they compound across hundreds of trades into the second-largest determinant of equity curve.
    • Three cost components: spread (bid-ask gap), slippage (price difference at execution), commission (direct fee).
    • Costs hit scalping strategies disproportionately — same 1-pip cost cuts a scalper’s edge by 60%+ but a swing trader’s by less than 5%.
    • Tail-risk slippage during news, weekend gaps, and black swans can exceed your stop by 10-20x — only defense is smaller size for events.
    • True cost = avg spread + avg slippage (round-trip) + commission. Calculate it for your typical conditions.
    • Practical reductions: trade liquid sessions, avoid news entries, set max-spread filters, match stops to spread, compare brokers on total cost.

    Get RiskFlow Pro

    Live spread tracking. Max-spread filter. Cost-aware sizing.

    Stop letting transaction costs quietly eat your edge. Free MT5 dashboard, any broker, any instrument.

    Download Free on MQL5 →

    For setup walkthrough, read the Quick Start Guide.

  • Partial Close: Where to Set Each Level (and Why Most Traders Set Them Wrong)

    Education · Trade Management · 9 min read

    Most retail traders set partial close levels the same way they set entry triggers — by intuition. Some close half at +1R because that “feels right.” Others close a third at +2R because they read it in a book. Almost nobody does the math on what their specific partial close structure actually does to their expected return.

    The hard truth: most retail partial close strategies are mathematically destructive. They feel safe because they “lock in profit early.” They reduce overall expectancy because they cut winners before the trade math has a chance to compound.

    The good news is that the math is not complicated. Once you see it laid out, picking the right partial close levels for your specific strategy becomes a simple matching problem rather than guesswork.

    The Core Insight

    Partial close levels should be set based on your strategy’s R-distribution, not on round numbers. If your average winner runs 3R, closing half at +1R kills two-thirds of the trade’s expected value. If your average winner runs 1.2R, holding the full position past +1R is fighting the natural exit point.

    What Partial Closes Actually Do to Expectancy

    Most traders treat partial closing as “free profit” — bag some R now and let the rest run. The math says otherwise. Every partial close has a real cost in lost expectancy on the closed portion of the position.

    Take a strategy with 50% win rate and average winner of +3R. Without partial closes, the math is straightforward:

    NO PARTIAL CLOSE — 100 TRADES

    50 winners x +3R = +150R

    50 losers x -1R = -50R

    Net per 100 trades : +100R

    Now imagine the trader closes 50% of the position at +1R and lets the rest run to +3R. They feel like they “locked in profit early.” But the actual math:

    50% CLOSE AT +1R — 100 TRADES

    50 winners: half at +1R, half at +3R = 50 x (0.5 + 1.5) = +100R

    50 losers x -1R = -50R

    Net per 100 trades : +50R (half of no-partial)

    Closing half at +1R cut total expectancy by 50% — even when the strategy is exactly the same and every winning trade still goes to +3R. The “safety” of locking in early profit was paid for with half the strategy’s edge.

    This is the core trap: partial closes feel like they reduce risk, but on a strategy that already wins 50% with 3R winners, they only reduce profit. The “risk reduction” exists only when winners regularly retrace from +1R back to losses — and that is a strategy problem, not a partial-close problem.

    When Partial Closes Genuinely Add Value

    Partial closes are not always destructive. They are mathematically positive in three specific scenarios — and disastrous outside those scenarios.

    1. High Retracement-To-Reversal Rate

    If your strategy frequently has trades that hit +1R, then retrace, and ultimately end as losers, partial closes genuinely save expectancy. A trade that goes to +1R, then back to -1R full position is a -1R loss. The same trade with 50% closed at +1R becomes 0.5R win + 0.5R loss = breakeven. The partial close converts losses into breakevens — that is real value.

    The diagnostic question: “Of my last 50 trades that touched +1R, how many ended below entry?” If more than 25%, partial close at +1R adds expectancy. If less than 10%, partial close at +1R subtracts expectancy.

    2. Long-Tail Winner Distribution

    If your strategy occasionally has massive 5R, 8R, or 10R winners but most winners are 1.5R-2R, partial closing at the modal winner level (+1.5R) and letting a small portion run captures both the typical move and the outlier moves. The structure: close 70% at +1.5R, let 30% trail with ATR. Most trades exit cleanly at the typical level. The 5% of trades that turn into runners pay disproportionately because the runner portion catches the full upside.

    3. Prop Firm Daily Limit Pressure

    In prop firm challenges with tight daily limits, locking in profit early reduces the risk that a winning day turns into a losing day. The expectancy cost is real, but the benefit (avoiding daily limit breach during pullbacks) outweighs the cost specifically because the firm penalizes drawdown asymmetrically. This is the same logic discussed in The Drawdown Math Every Prop Firm Trader Should Know — within prop firm constraints, optimal trading is not the same as expectancy-maximizing trading.

    Pattern To Notice

    Each scenario above involves an asymmetry that partial closing specifically addresses — high reversal rate, fat-tail distribution, or external risk constraints. Outside these scenarios, partial closing usually just trades expectancy for emotional comfort.

    The Three Common Structures (And When Each Fits)

    Most experienced traders converge on one of three structures. Picking the right one for your strategy is more important than tuning the exact percentages.

    Structure A: Aggressive (50/50 at +1R)

    Close 50% at +1R, let the rest run to a defined target or trail. Best for: strategies with high reversal-to-loss rate (>30%), prop firm challenges, breakout strategies that often fade after first pop.

    +1R : Close 50% · Move stop to BE

    +target/trail : Close remaining 50%

    Structure B: Three-Step (33/33/34)

    Close a third at +1R, a third at +2R, last third trails. Best for: trend-following strategies with variable winner sizes, multi-instrument portfolios, and traders who want a balance between locking profit and capturing runners.

    +1R : Close 33% · Move stop to BE

    +2R : Close 33% · Move stop to +0.5R

    +trail : Close remaining 34%

    Structure C: Runner-Heavy (75/25 at +2R)

    Close 75% at +2R, let 25% run with wide trail. Best for: strategies with rare but huge winners (long-tail distribution), trend-following on H4/Daily, position trading. The bulk of trades close at a respectable level; the small remainder catches the home runs that make the year.

    +2R : Close 75% · Move stop to +1R

    +trail (ATR x 3) : Close remaining 25%

    Notice that all three structures pair partial closes with progressive stop moves — this is not optional. Closing partial without moving the stop forward defeats the purpose because the open portion still carries full original risk. The combination of breakeven stop moves with partial closes is what creates the multi-level protection most professionals use.

    For the trailing stop portion of the remaining position, the choice between fixed-pip and ATR depends on your instrument and timeframe — the trade-offs are covered in detail in ATR Trailing vs Fixed Pips.

    The Common Mistakes

    A few patterns destroy partial close performance regardless of which structure you pick:

    • Round-number triggers without strategy match. “+1R, +2R, +3R” is convenient mental shorthand, not strategy-derived levels. If your strategy’s modal winner is 1.7R, putting your first close at +1R cuts the trade right before the typical exit point.
    • Same percentage on every instrument. XAUUSD’s typical winner profile is completely different from EURUSD’s. The structure should reflect each instrument’s R-distribution, not a single rule across everything.
    • Closing too small a percentage. 10-20% partial closes are usually pointless — too small to meaningfully protect profit, too large to ignore. Either close 33% or more, or do not partial close at all.
    • Closing without moving the stop. A partial close at +1R while leaving the stop at the original distance does not “lock in profit” — the remaining open position still carries the full original loss potential. Always pair partial close with stop progression.
    • Manual partial close timing. The same execution problem as breakeven and trailing — markets move fast, you miss the level by 5 ticks, and the partial close fires at +0.95R or +1.1R depending on slippage. Either automate or expect inconsistent execution.

    The Decision Framework

    A simple decision tree that handles 90% of cases:

    • Strategy with R:R below 1:2 → Skip partial closes. Just take the full target.
    • Strategy with R:R 1:2 to 1:3, high reversal rate → Structure A (50% at +1R).
    • Trend-following with R:R 1:3+ → Structure B (33/33/34) or Structure C (75/25).
    • Position trading with rare 5R+ winners → Structure C, weighted toward letting the runner run.
    • Prop firm challenge → Structure A, with the partial close size chosen to keep daily losses below 60% of the firm’s daily limit even if the open portion stops out.

    The Honest Test

    Before committing to any partial close structure, run it against your last 100 closed trades two ways: with the partial structure, and without it. If the partial structure produces lower total R, drop the partial close entirely — it is costing you more than it is saving. This calculation often surprises traders who thought partial closes were obviously good practice.

    Making Partial Close Mechanical

    As with breakeven and trailing stops, the failure mode for partial close is rarely the rule itself — it is execution. Manual partial close means watching every position, calculating the exact lot size to close, hitting the close-partial button at the right R level. No human does this consistently across multiple positions during volatile sessions.

    A trade management EA that knows your entry, stop, and configured close levels removes the only step that traders consistently miss. You set the structure once (50% at +1R, 25% at +2R, etc.) and the EA executes it on every trade automatically — same level, same percentage, same stop progression, every time.

    RiskFlow Pro includes a multi-level partial close that supports up to three close levels with independent percentages and stop-progression rules per level. Combined with breakeven, ATR trailing, and daily drawdown protection, you get the full multi-level structure that professionals use without any manual button-pushing.

    For the partial close configuration walkthrough — including how the levels interact with the breakeven trigger and ATR trailing on the runner portion — the Advanced Features guide covers each setting in detail with worked examples.

    Key Takeaways

    • Partial closes are not free profit — they cost real expectancy on the closed portion.
    • Use partial closes only when there is a specific asymmetry: high reversal rate, fat-tail distribution, or external constraints like prop firm limits.
    • Three common structures: 50/50 at +1R, three-step 33/33/34, runner-heavy 75/25 at +2R.
    • Always pair partial closes with stop progression — closing partial without moving the stop is mostly pointless.
    • Match levels to your strategy’s R-distribution, not to round numbers.
    • Backtest with and without your partial close structure on 100 trades — keep it only if it improves total R.
    • Automate the execution. Manual partial close is the second most-skipped trade management rule after breakeven.

    Get RiskFlow Pro

    Three-level partial close, automated.

    Set the structure once. Apply it to every trade automatically. Free MT5 dashboard, any broker, any instrument.

    Download Free on MQL5 →

    For the full partial close + breakeven + ATR trail walkthrough, read the Advanced Features Guide.

  • Multi-Symbol Correlation Risk: Why Your 4 Independent Trades Aren’t Independent

    Education · Risk Management · 9 min read

    A trader opens four positions. They spent good time on each chart, each setup is technically sound, and each trade risks 1% of the account. Total exposure: 4%. Manageable. Right?

    Almost never. The four positions are usually not four independent bets — they are often the same bet expressed four different ways. When the market moves against the underlying theme, all four hit stops simultaneously, and the trader who thought they were risking 4% has actually lost 8%, 12%, or more.

    This is correlation risk, and it is the silent killer of traders who otherwise have decent risk management on individual trades. The math is brutal because it hides — every individual position looks safe right up until they all break together.

    The Core Insight

    Per-trade risk is not real risk. Real risk is the sum of all correlated exposures during a stress event. A 1% trade in EURUSD plus a 1% trade in GBPUSD plus a 1% trade in AUDUSD is not three 1% trades — it is one 3% bet that the dollar weakens, and it will hit 3% of drawdown together when it goes wrong.

    What Correlation Actually Means in Trading

    Correlation is a number between -1 and +1 that measures how two instruments move together. Values close to +1 mean they move in the same direction almost always. Values close to -1 mean they move in opposite directions. Zero means independent.

    Most retail traders treat correlation as an academic concept and ignore it in practice. This works fine until the day a major news event or risk-off move forces every correlated position to act as one — and then it is too late.

    TYPICAL FOREX CORRELATIONS (DAILY, ROUGH AVERAGES)

    EURUSD vs GBPUSD : +0.85 (very high)

    EURUSD vs AUDUSD : +0.70 (high)

    EURUSD vs USDCHF : -0.95 (mirror image)

    XAUUSD vs USD index : -0.75 (gold inverse to dollar)

    SPX vs NDX : +0.92 (essentially the same bet)

    The numbers shift over time, especially during regime changes — pairs that were +0.5 last year might be +0.85 this year. But the rough hierarchy is stable: major Forex pairs tend to move together against the dollar, indices move together as a “risk-on/risk-off” basket, and metals move inversely to the dollar.

    The Hidden Bet Problem

    Here is the trap that catches almost every multi-pair trader at least once: thinking you are diversified when you are concentrated.

    A trader sees four “different” setups — long EURUSD, long GBPUSD, long AUDUSD, short USDJPY. Each chart has its own structure, its own entry trigger, its own stop. The trader feels diversified because they are in four different pairs. But look at what those four positions have in common: they are all short the dollar. The technical setups are independent. The macro bet is identical.

    When the dollar rallies on a hot CPI print or hawkish Fed statement, all four positions move against the trader at the same time. The four “1% trades” become a single 4% loss event — and that is best case, because correlated stops typically all fire within minutes of each other, often with widening spreads making each fill worse than the calculated risk.

    WHAT THE TRADER THINKS vs WHAT THEY HAVE

    Stated risk : 4 x 1% = 4% total exposure

    Actual exposure : ~3.5% to single dollar move

    Stress event : -3.5% to -5% in one event

    The Three Correlation Clusters Every Trader Should Know

    You do not need to memorize a correlation matrix. You need to recognize the three clusters that catch retail traders most often.

    1. The Dollar Cluster

    EURUSD, GBPUSD, AUDUSD, NZDUSD all trade against the dollar as the second currency. When the dollar moves, all four move together (inversely). Adding USDJPY, USDCHF, USDCAD as shorts gives you the same exposure from the other side. A multi-Forex portfolio is almost always a leveraged bet on the dollar direction — the technical reasons for each individual trade are noise compared to that single macro factor.

    2. The Risk-On Cluster

    Equity indices (SPX, NDX, DAX), high-beta currencies (AUDUSD, NZDUSD, EURUSD on most days), and crypto all tend to rally together during “risk-on” sessions and fall together during “risk-off” panic. A long position in stocks plus a long position in AUDUSD plus a long position in BTCUSD is essentially three expressions of the same “risk appetite is healthy” thesis. They will all be wrong on the same day.

    3. The Inflation/Commodity Cluster

    Gold, oil, silver, and to a lesser extent copper and the AUD all tend to move together during inflation regime shifts. They are not perfectly correlated day-to-day, but during major inflation surprise events (CPI prints, OPEC announcements), they often spike or crash as a group. Long Gold plus long Oil plus long AUDUSD during a CPI release is a single inflation bet, not three diversified positions.

    The Quick Test

    Before opening a new position, ask: “If the dollar rallies hard right now, do all my open positions go red?” If yes, the new trade is not diversifying — it is doubling down.

    The Math of Correlated Risk

    Risk does not add linearly when positions are correlated. The proper way to think about it is the effective concurrent risk, which depends on the correlation coefficient.

    For two positions of equal size with correlation r, the combined stress-event loss is approximately:

    Combined risk = base risk x (1 + r) for positively correlated pairs

    Two 1% trades on EURUSD and GBPUSD (correlation +0.85) carry combined stress risk of about 1.85% — almost double the “diversified” math. Add a third correlated position and the combined risk approaches 3x the per-trade risk. The intuition that “more pairs equals more diversification” is exactly backwards inside a correlation cluster.

    FOUR 1% POSITIONS — EFFECTIVE RISK

    All independent (r=0) : ~2% effective

    All in one cluster (r=0.7) : ~3.5% effective

    All in same direction (r=0.9) : ~3.9% effective

    The “all independent” case is the academic ideal. In practice, retail traders who use technical setups across major Forex are almost always closer to the r=0.7 case — which means their stated 4% risk is really 3.5% concentrated risk, with much higher chance of all hitting stops together.

    The Practical Rules

    There are three simple rules that handle 95% of correlation risk without requiring you to calculate matrices in real time.

    Rule 1: Set a Cluster Cap

    Decide in advance the maximum exposure per cluster. A reasonable rule: no more than 2% combined risk in any single cluster. If you already have 1% in EURUSD long, you can add 1% in GBPUSD long — but that uses your full dollar-cluster budget. Adding AUDUSD long after that breaks the rule, even though “each trade is only 1%.”

    Rule 2: Half-Size Within Clusters

    If you are determined to take multiple correlated positions, halve the position size on each beyond the first. First trade: full 1% risk. Second trade in same cluster: 0.5%. Third: 0.25%. This keeps total cluster exposure under control while still letting you express conviction across multiple setups.

    Rule 3: Calendar-Aware Exposure

    Correlations spike during scheduled events. The day of NFP, FOMC, or major CPI prints, every dollar pair becomes essentially perfectly correlated for a 30-minute window. Either close correlated positions before high-impact news or accept that your effective risk during that window is roughly the sum of all positions, not the diversified estimate.

    Common Trap

    Believing that holding both long EURUSD and short USDCHF “hedges” because they are inversely correlated. This is mathematically wrong — those two positions are essentially the same bet on EUR strength, just with different cost structures. Hedging requires negatively correlated positions in the same direction, not opposite directions in inversely correlated instruments.

    The Account-Level View

    The fundamental shift that fixes correlation risk is changing how you think about position sizing. Instead of asking “what is the risk per trade?”, start asking “what is my total exposure if a single major event hits?”

    This connects directly to the position-sizing fundamentals covered in Position Sizing 101 — the per-trade math is necessary but not sufficient. Once you have correct per-trade sizing, the next layer is making sure the per-trade math does not compound across correlated positions.

    It is also the reason most blown accounts fail in ways the trader never expected, as discussed in Why Retail Traders Blow Accounts. The trader had “1% risk per trade” written in their journal. They were following it. They still hit -8% in a single news event because the four positions all moved together. The rule was right; the level of analysis was wrong.

    Tools That Make Cluster Tracking Automatic

    Tracking correlation exposure manually requires you to maintain a mental cluster map for every open position, recalculate on every entry, and adjust position sizes accordingly. In live trading, this almost never gets done correctly — markets move fast and the mental math gets dropped.

    A multi-symbol monitor that shows total open positions, accumulated risk by symbol group, and current spread/exposure across the whole portfolio removes the manual tracking step entirely. Instead of trying to remember “do I have too much dollar exposure?”, the answer is on the screen at all times.

    RiskFlow Pro includes a multi-symbol monitor floating window that shows every open position with live P&L, total risk, and the current spread state across symbols. Combined with the daily drawdown protection, you get a portfolio-level view of risk that catches correlation issues before they become 8% loss events.

    For the multi-symbol monitor walkthrough, the four risk modes that handle different exposure profiles, and how the daily limit interacts with concurrent positions, the Advanced Features guide walks through each tool in detail with worked examples.

    Key Takeaways

    • Per-trade risk is not real risk. Real risk is concurrent exposure during a stress event.
    • Three correlation clusters catch most retail traders: dollar pairs, risk-on instruments, inflation/commodity baskets.
    • Two correlated 1% trades carry roughly 1.85% combined stress risk, not 2%.
    • Set a cluster cap (2% combined max), half-size within clusters, and respect calendar-driven correlation spikes.
    • Inverse correlations are not hedges — long EURUSD plus short USDCHF is the same bet, not a hedge.
    • Use a multi-symbol monitor — manual cluster tracking always breaks down in live trading.

    Get RiskFlow Pro

    See your real exposure, not just per-trade risk.

    Multi-symbol monitor, total risk tracking, daily drawdown protection. Free MT5 dashboard, any broker, any instrument.

    Download Free on MQL5 →

    For the multi-symbol monitor walkthrough, read the Advanced Features Guide.

  • ATR Trailing vs Fixed Pips: Which Trailing Stop Actually Works?

    Education · Trade Management · 9 min read

    Trailing stops are one of the most universally recommended trade management tools in retail trading — and one of the most poorly implemented. Almost everyone agrees that “letting winners run while protecting profit” is the goal. Almost no one agrees on how to do it.

    Two methods dominate: ATR-based trailing, where the stop distance scales with current market volatility, and fixed-pip trailing, where the stop sits a constant distance behind price. Both have evangelists. Both have very real strengths. And applied to the wrong setup, both can quietly destroy what would have been your best trades.

    The Core Insight

    Fixed-pip trailing is a blunt instrument optimized for one specific market regime. ATR trailing is a self-adjusting tool that adapts to whatever the market gives you. The right choice depends on whether your edge cares about market regime — and whether you trade the same instrument in all conditions or change with volatility.

    How Each Method Actually Works

    Before debating which is better, the precise mechanics matter — because most traders use one of these without really understanding what it is doing tick by tick.

    Fixed-Pip Trailing

    You set a constant distance — say 30 pips. Every time price makes a new favorable extreme, the stop moves up (long) or down (short) to maintain exactly that 30-pip gap from the new high or low. The distance never changes regardless of how the market is behaving.

    Long EURUSD entered at 1.0850, fixed trail = 30 pips

    Price moves to 1.0900 · stop moves to 1.0870

    Price moves to 1.0950 · stop moves to 1.0920

    Price retraces to 1.0935 · stop unchanged (one-way only)

    ATR-Based Trailing

    You pick an ATR period (commonly 14) and a multiplier (commonly 2 or 3). The stop sits at price – (ATR × multiplier) for longs, recalculated as ATR updates. When volatility expands, the trailing distance widens automatically. When volatility contracts, the distance tightens. The percentage gap between price and stop responds to what the market is doing right now.

    Long XAUUSD at 2650, ATR(14) = 8 dollars, multiplier = 2

    Initial trail distance : 16 dollars (= 2 x 8)

    Volatility doubles, ATR=16 : trail widens to 32 dollars

    Volatility halves, ATR=4 : trail tightens to 8 dollars

    Notice the structural difference: fixed-pip is geometry-based (constant distance), while ATR is condition-based (responds to current volatility). This is the entire reason one might be better than the other in different scenarios.

    When Fixed-Pip Trailing Wins

    Despite all the textbook praise for ATR-based methods, fixed-pip trailing is genuinely better in three specific scenarios. Knowing when to reach for it is more valuable than picking a side.

    1. Stable, Range-Bound Markets

    When you trade an instrument that has predictable, stable volatility — major Forex pairs during normal sessions, for example — ATR’s responsiveness becomes noise rather than signal. Small ATR fluctuations cause small stop adjustments that rarely improve the trade outcome but add complexity. A simple fixed pip distance, calibrated to the pair’s average daily range, captures the same protection with cleaner mental model.

    2. Strategies with Defined Targets

    If your strategy already exits at a specific R-multiple or chart structure (resistance, prior swing high, fibonacci extension), fixed trailing’s role is just to protect what you have until the planned target hits. You do not want the stop wandering around with volatility — you want it sitting at a predictable distance behind price so the trade exits cleanly at your target without random noise stopping you out first.

    3. Lower Timeframes with Tight Spreads

    On the 5M and 15M chart, ATR can fluctuate dramatically within a single session as small bursts of volatility come and go. ATR trailing with a typical 14-period setting will widen the stop right when you want it tight (during clean trends) and tighten it during chop (when you want some breathing room). Fixed-pip avoids the whipsaw entirely.

    Practical Note

    Fixed-pip trailing also has a psychological advantage: you always know exactly where your stop is going to sit at the next price tick. This predictability helps with discretionary management decisions like “should I close manually now?” because the math is in your head, not on a chart indicator.

    When ATR Trailing Wins

    ATR’s adaptiveness becomes a real edge in specific market conditions where fixed-pip stops would either get whipped out or give back too much profit.

    1. Trending Markets with Volatility Expansion

    When a clean trend develops on Gold, oil, or indices, volatility typically expands as the trend matures. A fixed 30-pip trail set for normal conditions will be too tight by the time the trend is in full swing — you will get stopped out by routine intraday pullbacks during what should be your biggest winners. ATR widens the stop in lockstep with the expanding range, giving the trend the room it needs.

    2. Multi-Instrument Trading

    If you trade EURUSD, XAUUSD, USOIL, and US30 in the same session, fixed-pip stops require completely different settings for each (30 pips on EURUSD, 80 on Gold, 200 on US30 — meaningless across instruments). ATR-based stops use the same multiplier across everything; the indicator handles the per-instrument calibration automatically. This is huge for portfolio traders.

    3. Higher Timeframes with Wide Daily Ranges

    On the H4 and Daily chart, daily volatility cycles are much more pronounced. A trade that you opened during a quiet week and held through a CPI announcement experiences a 3-4x volatility expansion that ATR captures gracefully. Fixed-pip stops have no way to respond — either they were too wide for the quiet phase (giving back too much) or too tight for the noisy phase (stopping you out on noise).

    The Honest Assessment

    For most retail traders running multi-instrument strategies on H1 and above, ATR is the structurally better choice. The mental simplicity of fixed-pip is real but rarely worth the cost of being wrong about the market regime.

    The ATR Settings That Actually Matter

    Most ATR trailing failures come from misconfiguring the indicator, not from ATR being wrong. Two parameters do all the work:

    Period

    Default is 14, which means “average true range over the last 14 candles.” Shorter periods (7-10) make ATR more reactive — good for fast-moving instruments and lower timeframes. Longer periods (20-30) smooth the noise — good for slow-moving instruments and longer timeframes. The most common mistake is using 14 on every timeframe, which makes ATR too jumpy on M15 and too sluggish on Daily.

    Multiplier

    The multiplier is where most fine-tuning happens. The standard rule of thumb:

    ATR MULTIPLIER GUIDE

    Aggressive trail (scalp) : 1.0 – 1.5x ATR

    Standard trend-follow : 2.0 – 2.5x ATR

    Wide trail (let it breathe): 3.0 – 4.0x ATR

    Default sweet spot : ATR(14) x 2

    Pick the multiplier based on what you are trying to capture. If you want to ride 4R+ moves and survive normal pullbacks, use 3x. If you want quick exits to lock in 1.5R, use 1x. The same trade with different multipliers produces completely different equity curves — even though the underlying signal logic is identical.

    The Hybrid Approach Pros Use

    Experienced traders rarely use either pure fixed-pip or pure ATR. The structure that consistently outperforms both is a phased trail that switches methods based on trade phase:

    PHASED TRAILING — REAL-WORLD STRUCTURE

    Phase 1 (entry to +1R) : Initial fixed stop, no trail yet

    Phase 2 (+1R to +2R) : Fixed-pip trail, BE + small offset

    Phase 3 (+2R to +4R) : Switch to ATR(14) x 2 trail

    Phase 4 (+4R+) : ATR(14) x 3 — give it room

    This handles both the early-trade need for tight risk control (where fixed-pip is cleaner) and the late-trade need for volatility-adapted protection (where ATR shines). The transition between phases happens automatically based on R-multiples, not on trader judgment.

    Common Mistakes With Both Methods

    A few patterns destroy trailing stop performance regardless of method:

    • Trailing too early. Both methods need a small profit cushion before activating, otherwise normal entry-level noise stops you out. A reasonable rule: do not start trailing until at least +1R is reached.
    • Removing the trail to hold a winner longer. The instinct is “this trade looks great, let me give it more room.” This is the same psychological trap as removing breakeven mid-trade. The trail rule exists to protect you from your future self — overriding it always pays the price eventually.
    • Using the same settings everywhere. The 30-pip trail that works on EURUSD is laughably tight on XAUUSD and absurdly wide on AUDNZD. Fixed-pip needs per-instrument calibration; ATR handles this automatically.
    • Ignoring spread cost in the trail distance. Your effective trail is always (set distance + current spread). On wide-spread instruments during news, a 30-pip trail can become a 50-pip trail temporarily. ATR handles this implicitly because spread widens during volatility expansion. Fixed-pip needs explicit padding.
    • Manual implementation. The same execution problem as breakeven — manual trailing means watching every tick on every position. No human does this consistently. Either automate it or do not bother.

    Decision Framework

    A practical rule that handles 90% of cases:

    • Single major Forex pair on M15-H1 → Fixed-pip is fine. Calibrate to roughly 25-40% of the pair’s average daily range.
    • Multi-instrument basket (Forex, Gold, indices) → ATR. Same multiplier across everything.
    • Trend-following on H4 / Daily → ATR with multiplier 2.5-3. Volatility cycles are too pronounced for fixed-pip to work.
    • Scalping on M1 / M5 → Fixed-pip with very tight setting (8-15 pips). ATR adds noise at this granularity.
    • Trade-through-news strategy → ATR. The whole point is volatility-adaptive protection.
    • Defined-target strategy with chart structure exit → Fixed-pip. The trail is just protection until the planned exit triggers.

    Backtesting Both — The 100-Trade Test

    If you are not sure which method fits your strategy, the answer is in your own historical trades. Run this test on your last 100 closed positions:

    • Reconstruct each trade with no trailing — what did it actually achieve?
    • Reconstruct it with a 30-pip fixed trail activated at +1R — what would the outcome have been?
    • Reconstruct it with ATR(14) x 2 trail activated at +1R — what would the outcome have been?
    • Compare total R captured across all three approaches.

    For most retail traders, the result surprises them: ATR captures more R total but with higher variance — some trades become huge winners, others get stopped out earlier. Fixed-pip captures less total R but with smoother distribution. The “right” answer depends on whether your psychology can tolerate the variance — a perfectly good system that you stop following because of three painful trades is worse than a slightly suboptimal one you stick with.

    Making the Trail Mechanical

    As with breakeven and partial close, the failure mode for trailing stops is rarely the rule itself — it is execution. Manual trailing means watching every position every tick, hitting the modify button at the right moments, recalculating ATR mentally as candles close. No human does this on 4 positions across 4 instruments simultaneously. Even experienced traders skip it during busy sessions.

    The fix is automation. A trade management EA that calculates the trail distance — fixed pips, ATR, or a phased combination — and updates the stop on every tick removes the only step that traders consistently miss. The math is enforced by the platform, not by your willpower at minute 47 of a frustrating session.

    RiskFlow Pro includes both modes — fixed-pip trailing and ATR-based trailing — switchable per setup. You set the period and multiplier once, and the EA applies the trail to every position automatically across any instrument. Combined with breakeven and multi-level partial close, you get the full phased trade management structure described above without any manual button-pushing.

    For the full Manage tab walkthrough — how trailing interacts with breakeven, partial close, and the daily drawdown protection that keeps you compliant with prop firm rules — the Advanced Features guide walks through each setting in detail with worked examples.

    Key Takeaways

    • Fixed-pip trailing is geometry-based; ATR trailing is condition-based. Each fits different market regimes.
    • Use fixed-pip for stable single-pair Forex, defined-target strategies, and lower-timeframe scalping.
    • Use ATR for multi-instrument baskets, trend-following on H4/Daily, news-active trading, and volatile instruments.
    • Standard ATR settings: period 14, multiplier 2 — adjust multiplier to taste (1x for tight, 3x for wide).
    • The phased approach (fixed-pip early, ATR later) outperforms either pure method for most strategies.
    • Backtest both on your last 100 trades — the right answer is the one your psychology can stick with.
    • Always automate the trail. Manual trailing is the most consistently broken rule in retail trading.

    Get RiskFlow Pro

    Fixed-pip and ATR trailing — switchable per setup.

    Set the rules once. Apply them to every trade automatically. Free MT5 dashboard, any broker, any instrument.

    Download Free on MQL5 →

    For the full trailing-stop walkthrough alongside breakeven and partial close, read the Advanced Features Guide.

  • The Drawdown Math Every Prop Firm Trader Should Know

    Education · Prop Firm · 10 min read

    Most prop firm challenges are not lost because traders pick bad trades. They are lost because traders do not understand what their drawdown limits actually allow them to do — and they discover the math the hard way, usually three days before passing.

    A 5% daily loss limit and a 10% maximum drawdown sound like reasonable numbers when you read them on the firm’s website. They become much more restrictive once you do the math on what they imply about position size, trade frequency, and recovery from any losing day. Understanding that math before you start the challenge is the difference between passing on the first attempt and grinding through five $99 resets.

    The Core Insight

    Prop firm rules are a constraint optimization problem, not a trading challenge. The trader who passes is not the one with the best edge — it is the one whose position sizing and trade frequency stay mathematically inside the constraints on the worst possible day.

    Two Drawdown Limits, One Trader

    Almost every prop firm imposes two separate drawdown rules — and they interact in ways that catch new traders off guard.

    1. Daily Drawdown

    Usually 4% or 5% of the starting balance. If your equity drops below this threshold during a trading day, the account fails immediately. The clock typically resets at 5pm New York time (FTMO and similar) — meaning your 5% allowance refreshes each new trading day, but it never accumulates.

    2. Maximum Drawdown

    Usually 10% of the starting balance, measured against either the starting balance (static) or the highest equity reached so far (trailing). If your equity ever drops below this floor, the account fails permanently — no daily reset.

    FTMO $100K CHALLENGE EXAMPLE

    Starting balance : $100,000

    Daily loss limit : -$5,000 (5%)

    Max drawdown floor : $90,000 (10%)

    Profit target : +$10,000 (10%)

    Notice the asymmetry that almost no marketing material highlights: you need to make 10% to pass, but you can only lose 10% total to fail. Your reward and risk allowances are exactly equal. That is a much harder mathematical problem than “trade well.”

    The Position Size Trap

    Most challenge accounts blow up not from one catastrophic trade but from a position size that quietly violates the daily limit on a normal-feeling losing day.

    Imagine you decide on 2% risk per trade. That sounds disciplined. On a $100K account, 2% is $2,000 per trade. Sounds fine — well below the $5,000 daily limit. Now ask: how many losing trades in a row can you take?

    2% RISK ON $100K — DAILY MATH

    1 loss : -$2,000 (within limit)

    2 losses : -$4,000 (within limit)

    3 losses : -$6,000 (BREACH — account fails)

    → At 2% risk, three losers in a day = challenge over.

    Three losing trades in a single session is not unusual for any strategy. It is mathematically expected for a 50% win rate to hit a 3-loss streak roughly once every 8 trading sessions. So 2% risk per trade plus normal trade frequency means a guaranteed daily-limit breach within roughly two weeks of trading. Not “if” — “when”.

    The math forces a specific conclusion: to survive a normal losing streak inside the daily limit, your risk per trade must be small enough that 4-5 consecutive losses still keep you safely under 5%. That means risk per trade should typically be 0.75%-1% on a 5% daily limit account. Anything higher and you are gambling with the daily reset.

    The Static vs Trailing Drawdown Trap

    The 10% max drawdown is where most challenges actually die — and the type matters enormously.

    Static Drawdown (Easier)

    The floor stays at $90,000 forever (on a $100K account). You can grow the account to $115K and pull back to $91K — the account survives because you are still above the static floor.

    Trailing Drawdown (Harder)

    The floor moves up with your equity high-water-mark. Reach $115K, and the floor jumps to $105K (i.e., $115K minus $10K). Now a pullback to $104K kills the account — even though you are still in profit overall.

    SAME TRADE, DIFFERENT OUTCOME

    Starting balance : $100,000

    Equity peak : $115,000

    Equity drops to : $104,000

    Static DD floor : $90,000 → SAFE

    Trailing DD floor : $105,000 → ACCOUNT FAILED

    This is why traders running trailing drawdown accounts often pass the challenge but fail the funded account. They use aggressive sizing during the challenge to hit the 10% target fast, then keep the same sizing on the funded account where every winning streak tightens the noose. Trailing drawdown rewards consistency and punishes streaks — even winning streaks.

    Read the Fine Print

    Some firms freeze the trailing drawdown once it reaches the starting balance (e.g., once your trailing floor hits $100K, it stops moving up). Others continue trailing forever. The difference is enormous — find this out before you take the challenge, not after.

    Recovery Math After a Bad Day

    When a losing day takes you near the daily limit, the recovery math gets ugly fast. This is where most traders compound the problem instead of fixing it.

    Imagine you are running a $100K challenge. You hit a -4% day (close to the 5% daily limit but not over). You are now sitting at $96,000. Tomorrow you need to keep building toward the 10% profit target — but you also need to be very careful, because you have less buffer to the 10% max drawdown.

    AFTER A -4% DAY ON $100K

    Current equity : $96,000

    Distance to max DD : $6,000 (only 6% away)

    New daily limit : -$4,800 (5% of fresh equity)

    → One more 5% loss day = challenge dead

    The trader’s instinct is to size up the next day to “make back” yesterday’s loss faster. This is the killing move. Sizing up after a loss day inverts every assumption your survival math was built on. The correct response after a losing day is to size down by 50% for at least the next session, not to size up. The math allows you to recover slowly. It does not allow you to recover fast.

    The Profit Target Math

    A 10% profit target on a 5% daily limit creates a counterintuitive situation: you need to make 10% but you can never have a 10% day. Even if you have an incredible session, you cap out around 4.5% before risk-of-ruin math forces you to stop.

    This means the path to 10% profit looks something like:

    REALISTIC PASS PATH — 30 DAYS

    Average up day : +1.2% (about 50% of days)

    Average down day : -0.8% (about 30% of days)

    Flat days : ~0% (about 20% of days)

    Net per month : ~+12% → comfortable pass

    That is what passing the challenge looks like in practice — small consistent wins, small controlled losses, no hero days. The trader who scores +6% on Tuesday because XAUUSD trended hard might still pass, but they have just halved their remaining error budget for the next four weeks.

    The Time-Of-Day Problem

    Almost every prop firm uses a specific timezone for the daily reset — usually 5pm Eastern Time (US) or midnight CET (European firms). This timezone matters more than most traders realize.

    If your daily reset is 5pm New York and you are trading the London session, your entire trading day might happen on the wrong side of the reset. A trade you opened Monday at 3pm London (10am NY) and held through the New York session and into Tuesday morning London — that trade spans two firm “days.” The opening hours of profit count toward Monday’s daily; the rest count toward Tuesday’s.

    For traders running overnight or multi-session strategies, this means a single losing position can simultaneously eat your Monday daily budget and your Tuesday daily budget. Always know exactly when the reset happens in your local time, and structure your trade timing around it.

    Practical Tip

    FTMO and most US-based firms reset at 5pm New York time. For traders in Bangkok, Singapore, or Sydney, that is roughly 4-7am local — meaning your “trading day” runs essentially aligned with the local Asian session. Plan your max-loss budget per local session, not per calendar day.

    The Survival Position Sizing Formula

    Pulling all of this together, here is the position sizing rule that survives prop firm constraints:

    Risk per trade = (Daily limit × 0.4) / Max trades per day

    Translation: only use 40% of your daily limit budget for actual trade losses (leaving 60% as buffer for spread widening, slippage, partial-close timing, and margin spikes), and divide that across the maximum number of trades you might take in a session.

    For a $100K FTMO account with 5% daily limit and a strategy that might take up to 4 trades per session:

    Daily limit : $5,000

    Buffered budget (40%) : $2,000

    Max trades / day : 4

    Risk per trade : $500 (= 0.5%)

    0.5% risk per trade feels conservative on a normal account. On a prop firm challenge, it is the size that allows you to take 4 consecutive losses, still be within the daily limit, and still have buffer for the next session. That is the survival sizing.

    Automating the Constraints

    All of this math is correct only if you actually enforce it during live trading. Most challenge failures are not failures of math — they are failures of discipline at minute 47 of a frustrating session. The trader knows the rule. They just stop following it when the market makes them angry.

    The fix is to make the constraints structural rather than psychological. A trade management EA that knows your daily limit, tracks accumulated losses across the day, and refuses to let you place a trade once you are within X dollars of breaching — that is what removes the human failure mode. The math is enforced by the platform, not by your willpower at the wrong moment.

    RiskFlow Pro includes daily drawdown protection that does exactly this — set your daily loss limit (matched to your prop firm’s rules), and the EA will block new trade entries once accumulated daily loss reaches the threshold. Combined with automated position sizing from your risk %, the platform makes the survival math impossible to violate, even when you forget you set it.

    For prop firm specific setup — daily reset timezone configuration, the four risk modes that match different challenge structures, partial close strategies that pair well with tight daily limits — the Advanced Features guide walks through the FTMO section in detail, including how to handle the CET vs NY reset cleanly so your daily budget aligns with your actual trading session.

    Key Takeaways

    • Prop firm challenges are constraint optimization problems — the trader who passes is the one whose math survives the worst possible day.
    • Daily and max drawdown interact: at 2% risk per trade, three losers in a session breaches the daily limit.
    • Trailing drawdown punishes winning streaks as much as losing ones — know your firm’s rule before starting.
    • The correct response to a losing day is to size down by 50%, not size up to “recover.”
    • Realistic pass path: ~1.2% average up day, ~-0.8% average down day, no hero sessions.
    • Survival sizing formula: (Daily limit × 0.4) / Max trades per day. On 5% daily / 4 trades, that is 0.5% risk per trade.
    • Automate the daily limit enforcement — willpower fails at minute 47.

    Get RiskFlow Pro

    Pass the challenge by making the rules unbreakable.

    Daily drawdown protection, prop-firm-aware reset timing, automated position sizing — built for FTMO, MyForexFunds, and similar challenges.

    Download Free on MQL5 →

    For the FTMO-specific setup walkthrough, see the Advanced Features Guide.

  • Breakeven Stops: When to Move, When to Wait

    Education · Trade Management · 8 min read

    Moving your stop loss to breakeven feels like the responsible thing to do. The trade is in profit, the worst case is now zero loss, and you can sleep at night. Every trading book repeats some version of “always protect your capital first.”

    But here is what nobody mentions: aggressive breakeven moves are also one of the most common reasons traders bleed equity in trending markets. The trade you stopped out at breakeven yesterday is the same trade that ran 8R today — without you. Multiply that mistake across a year and “responsible risk management” turns into a slow drain on your equity curve.

    The real skill is not knowing how to move stops to breakeven. The real skill is knowing when to move them — and when to leave them alone.

    The Core Trade-Off

    Every breakeven move trades drawdown protection for expected value. Move too early and you cap winners at zero. Move too late and you give back open profits. The right answer depends on your strategy, your timeframe, and what the market is actually doing right now — not on a fixed rule.

    What “Breakeven” Actually Means

    A breakeven stop moves your stop loss from its original level to your entry price (plus or minus a small offset to cover spread and commission). Once moved, the trade can no longer lose money — but it can no longer be a “breakeven loser” either, because the stop now sits in front of price action that would otherwise still be normal market noise.

    Breakeven is almost always triggered at a multiple of your initial risk distance, expressed in R-multiples:

    Entry: 1.0850 · Initial SL: 1.0820 · R = 30 pips

    Trigger BE at 1R → when price hits 1.0880, move SL to 1.0850

    Trigger BE at 0.5R → when price hits 1.0865, move SL to 1.0850

    The trigger R is the variable that changes everything. Move at 0.5R and you protect against more drawdown, but get stopped out frequently on normal pullbacks. Move at 2R and you let trades breathe, but give back more open profit when winners reverse.

    When to Move Aggressively (Early)

    There are specific situations where moving to breakeven at 0.5R or 1R makes mathematical sense. They share one common feature: the strategy does not depend on catching big runners.

    Scalping and short-term mean reversion

    If your average winner is 1.5R and you take 5+ trades per day, you do not need any single trade to run to 5R. A 0.5R-1R breakeven move protects you from intraday reversals that would otherwise turn 70% of your “almost winners” into full losers. The cost (capping a few runners) is small relative to the benefit (preserving high win rate).

    News-driven trades

    When you enter on a news catalyst, the reason for the trade has a known expiration. Once price has moved 1R in your direction, the news edge is mostly priced in — anything beyond that is just market noise. Moving stops aggressively prevents you from giving back the news pop when liquidity returns to normal.

    Prop firm challenges

    When you are 2 winning trades away from passing FTMO Phase 1 and one losing trade away from blowing it, the math changes completely. Locking profits at 1R becomes more valuable than chasing 3R wins. The asymmetry of “pass or fail” overrides the asymmetry of “winners pay for losers.”

    Quick Heuristic

    If your strategy expects average winners under 2R, move stops to breakeven at 1R. If you expect winners to average 3R+, wait until 1.5R-2R before moving — or skip breakeven entirely and use a wider trailing stop.

    When to Wait (or Skip Breakeven Entirely)

    The opposite case — where aggressive breakeven moves actively hurt your edge — happens more often than most traders realize.

    Trend-following and breakout strategies

    If your strategy depends on catching the occasional 5R-10R move to make a profit (think trend following, breakout trading), moving to breakeven at 1R is statistically equivalent to throwing away your edge. The math: in trending strategies, the winners that cover all your losers are the ones that go past 3R. If you cap them at breakeven on every normal pullback, you eliminate the only trades that pay your bills.

    Trend strategy: 35% win rate, average winner 4R

    Without BE: 35% x 4R – 65% x 1R = +0.75R per trade

    With BE@1R that triggers on 30% of winners that pull back:

    Net edge collapses from +0.75R to under +0.30R per trade

    Same strategy, same trades, same market — half the expected value. The breakeven move did not protect anything; it just moved the loss from “small loss on a stop-out” to “missed gain on a winner that reversed temporarily before continuing.”

    Higher-timeframe swing trades

    On a daily or weekly chart, “1R” might represent a multi-day move. Moving stops to breakeven the moment price hits 1R means stopping out on normal intraday volatility. Swing trades need room to breathe — typically waiting until 2R-3R before any stop adjustment, and then trailing rather than locking flat.

    Strategies with edge in pullbacks

    Some strategies actually expect price to retrace 30-50% before continuing. If your entry method exploits this pattern, moving to breakeven at 1R puts your stop directly in the path of normal expected behavior. You will get stopped out, then watch price continue exactly as your strategy predicted — without you in the trade.

    The Offset That Most Traders Forget

    When the EA or platform moves your stop “to breakeven,” it usually places it exactly at your entry price. This sounds correct, but in practice creates a hidden loss every single time it triggers.

    Why? Because spread and commission still apply. A buy entry at 1.0850 with a stop at 1.0850 will close at the bid (~1.0848 with a 2-pip spread), giving you a small loss. Add commission and you might be losing $5-$15 per “breakeven” trade. Run that across 200 trades a year and your “loss-free” stops cost you $1,000-$3,000.

    The fix is simple: configure breakeven to move the stop to entry plus an offset — usually 2-5 pips for Forex pairs, larger for instruments with wider spreads (gold, indices, oil). The offset covers the spread and commission, ensuring “breakeven” actually means breakeven.

    Buy at 1.0850, spread 2 pips, commission $7

    SL at exact entry 1.0850 → triggers at 1.0848 → -$27 net

    SL at entry + 5 pip offset 1.0855 → triggers at 1.0853 → +$23 net

    Multi-Level Breakeven — The Underrated Technique

    The biggest leap in stop management beyond single-trigger breakeven is using multiple levels. Instead of one binary “BE on at 1R” decision, you stage protection in tiers:

    • Level 1 at 1R: Move SL to entry + small offset (true breakeven).
    • Level 2 at 2R: Move SL to +0.5R (lock half the original risk as profit).
    • Level 3 at 3R: Move SL to +1.5R (lock 1.5x your risk regardless of what happens next).

    Each level fires once and never moves backward. The result: you keep your stop wide enough to let trades breathe early, but progressively tighter as the trade matures. This is the structural setup professional traders use because it captures both runner-friendly behavior at the start and aggressive profit protection toward the end.

    Practical Tip

    Multi-level breakeven only works if it executes automatically and only once per level. Manual multi-level management is the fastest way to make double-modification mistakes that move stops in the wrong direction during fast moves. Always use a tool that bitmask-tracks which levels have already fired per ticket.

    The “Mental Breakeven” Trap

    Some traders avoid moving stops at all and instead use a “mental breakeven” — they tell themselves they will close the trade manually if price comes back to entry. This sounds disciplined. It is not.

    In practice, mental breakeven fails three ways:

    1. You are not watching when it matters. The reversal happens during your sleep, your meeting, your lunch — the exact moment you cannot react.
    2. You hesitate when you are watching. Price comes back to entry and you think “let me give it a few more pips.” That is how mental breakevens become 1R losses.
    3. It defeats the purpose of automation. If you have to babysit the trade, you have just downgraded a position-sizing system into a discretionary trade.

    If you are going to use breakeven at all, it has to be a hard stop attached to the position by the broker. Mental discipline is not the bottleneck — execution speed is.

    Putting It All Together

    A practical decision framework:

    • Scalping or news trading? Single-level BE at 0.5R-1R with a 2-5 pip offset.
    • Intraday trend following? Multi-level BE at 1R / 2R / 3R, paired with a trailing stop after level 3.
    • Higher-timeframe swing? Skip BE entirely, use ATR-based trailing from 2R onward.
    • Prop firm challenge phase? Aggressive BE at 1R, prioritize pass over profit maximization.
    • Live funded account? Match your live BE rules to whatever you backtested. Do not “tighten up” because the money is real.

    The point is: breakeven is a strategy-specific tool, not a universal best practice. Backtest it explicitly against your strategy. If turning it on improves your equity curve, use it. If turning it on flattens your big winners, leave it off.

    Making It Automatic

    All of the above only works if breakeven is enforced automatically. Manual breakeven management is the source of the three failure modes above — missed moves, hesitation, and accidental double-modification.

    RiskFlow Pro handles single-level and multi-level breakeven automatically, with configurable trigger R, offset in pips, and per-ticket bitmask tracking so each level only fires once. The same dashboard manages partial close at progressive R-multiples, so you can stage profit protection alongside breakeven moves without any manual intervention.

    For the full breakdown of how multi-level breakeven, partial close, and ATR trailing combine in real trade scenarios — including specific FTMO setups — the Advanced Features guide walks through each combination with concrete examples on Gold, EURUSD, and US30.

    Key Takeaways

    • Breakeven is not free — it trades drawdown protection for expected value. The right setting depends on your strategy.
    • Move early (0.5R-1R) for scalping, news trading, and prop firm challenges where capping risk matters more than catching runners.
    • Move late or skip entirely for trend-following, breakout, and swing strategies where 5R+ winners pay for losers.
    • Always use an offset in pips to cover spread and commission — “exact entry” breakeven is actually a small loss every time.
    • Multi-level breakeven (1R, 2R, 3R) outperforms single-level for most intraday strategies — but only if executed automatically.
    • Mental breakeven is not breakeven. If it is not enforced by the broker, it does not exist.

    Get RiskFlow Pro

    Multi-level breakeven, automatic, on every trade.

    Stage your stops at 1R, 2R, 3R with configurable offsets — and pair with partial close at the same levels.

    Download Free on MQL5 →

    For multi-level setups, partial close pairing, and FTMO-specific configs see the Advanced Features Guide.

  • Fixed % vs Fixed $ Risk — Which Actually Works?

    Education · Risk Management · 9 min read

    Open any trading book and the advice on position sizing splits into two camps. Camp one says “risk a fixed percentage of your account on every trade”. Camp two says “risk a fixed dollar amount”. Both have advocates with track records. Both sound reasonable. But under different account conditions, one of them will quietly destroy you while the other lets you compound.

    The right answer is not “always pick one.” The right answer is knowing which method matches your account size, your strategy, and the phase of your trading career you are in.

    The Short Answer

    Fixed % is mathematically superior for compounding accounts above $10k. Fixed $ is more practical for very small accounts and for prop firm challenges with strict daily loss caps. Most traders should use fixed % with a hard dollar ceiling — the best of both worlds.

    How Each Method Actually Works

    Before debating which is better, let us define exactly what each one does on a real trade.

    Fixed Percentage Risk

    You decide on a percent of your account to risk per trade — say 1%. The actual dollar risk recalculates with every change in account balance. After winners, your dollar risk grows. After losers, it shrinks.

    Account: $10,000 · 1% risk = $100 per trade

    Account grows to $15,000 · 1% risk = $150 per trade

    Account drops to $8,000 · 1% risk = $80 per trade

    Fixed Dollar Risk

    You decide on an exact dollar amount to risk per trade — say $100 — and you keep that amount constant regardless of what happens to the account.

    Account: $10,000 · fixed $100 = 1.0% risk

    Account grows to $15,000 · fixed $100 = 0.67% risk

    Account drops to $8,000 · fixed $100 = 1.25% risk

    Notice the asymmetry: with fixed $, your effective risk percentage grows when the account shrinks. This is the core danger of fixed dollar sizing — and the core advantage of fixed percentage sizing.

    The Compounding Argument for Fixed %

    Fixed % wins the math contest hands down. Imagine two traders with $10,000 accounts, both running a strategy that produces 100 trades per year with a 60% win rate and 1:1 R:R. Both risk $100 per trade in absolute terms at the start of year one.

    After year one, both accounts are at $12,000 (60 wins minus 40 losses, net +$2,000). Now what happens in year two?

    YEAR 2 — STARTING AT $12,000

    Trader A (1% fixed) → risks $120/trade → ends year at $14,400

    Trader B ($100 fixed) → risks $100/trade → ends year at $14,000

    A 2.8% advantage in year two. Repeat this for ten years and Trader A is significantly ahead — not because their strategy is better, but because their risk grew with their winnings. Compounding only works if your bet size scales with your bankroll.

    The opposite case is more painful. If both traders have a bad year and end down at $8,000, Trader A automatically risks less ($80/trade) for year two — which protects them. Trader B keeps risking $100/trade, which is now 1.25% of a smaller account. If the bad year continues, Trader B accelerates toward zero while Trader A decelerates.

    When Fixed Dollar Actually Wins

    If fixed % is mathematically dominant, why does anyone still use fixed $? Because in three specific situations it is genuinely the better choice.

    1. Very Small Accounts

    On a $500 account, 1% risk is $5. Many brokers have minimum lot sizes that make $5 risk impossible to achieve precisely — you end up either over-risking (the next-step-up lot size risks $8 or $12) or unable to take the trade at all. Fixed dollar sizing lets you set a workable risk amount that matches what your broker will actually accept.

    2. Prop Firm Challenges with Daily Loss Caps

    Most prop firms (FTMO, MyForexFunds, etc.) impose a hard daily loss limit — often 4% or 5% of starting balance. With fixed % sizing, your dollar risk per trade compounds along with profits during a winning streak inside the day, which can push you over the daily cap faster than expected. Fixed dollar sizing keeps your daily exposure mathematically capped: 4 trades at $200 risk = $800 max daily loss, locked.

    3. Strategies with Variable Win Quality

    If your strategy has clearly defined “A-grade” and “B-grade” setups (think: trades meeting all your criteria vs trades meeting most), fixed dollar sizing per grade is cleaner than constantly recalculating percentages. You might risk $200 on every A-setup and $100 on every B-setup, regardless of account size. This makes performance review much easier — you can immediately see which grade is actually profitable.

    Reality Check

    Fixed dollar is also psychologically easier when the account is in drawdown. It is harder to take a trade when “1% of my account” keeps getting smaller and feels like surrender. A constant dollar amount feels more like business-as-usual.

    The Hybrid Approach Most Traders Should Use

    In practice, the smartest setup combines both. Here is the rule that experienced traders converge on after a few years:

    Risk = MIN(account x 1%, fixed $ ceiling)

    Translation: risk 1% of your account per trade, but never more than a hard dollar ceiling you set in advance. For example: 1% of account, capped at $500 per trade.

    Why this works:

    • Below the ceiling, you get the compounding benefit of fixed % — your risk grows with the account, your wins grow proportionally.
    • Above the ceiling, your absolute dollar risk stops growing. This protects you from a single trade becoming psychologically too large to manage rationally — a real problem once accounts cross six figures.
    • In drawdown, fixed % automatically reduces your absolute risk — so you decelerate naturally when things go wrong.

    Most traders start with pure fixed % (1% or 0.5%) and add the dollar ceiling later when their account grows large enough that risking the full % per trade starts feeling uncomfortable.

    The Mistake That Kills Both Methods

    Whether you use fixed % or fixed $, both methods break the moment you start trading instruments where your lot size calculation is silently wrong.

    A trader can set their system to “1% per trade” and feel disciplined. But if they switch from EURUSD to gold and apply the same lot size mental math, they may actually be risking 5% or 10% — and they will not notice until the equity curve confirms it. The same problem hits fixed dollar traders: “I always risk $100” sounds disciplined, but if your gold trade is actually risking $700 because the tick value math went wrong, the discipline is illusion.

    This is why both methods only work when paired with automated lot calculation that reads the instrument’s real Tick Size and Tick Value. Without that, you are picking between two methods that will both lie to you about how much you are actually risking.

    Common Trap

    Switching between fixed % and fixed $ midway through a losing streak. This is almost always emotional, not strategic — traders move to fixed $ during drawdowns to “stop the bleeding from getting smaller” and then back to fixed % during recoveries. Pick one method, write it down, and only change it after a 100-trade review — never mid-streak.

    Choosing What Fits Your Account Today

    A practical decision tree for traders who want a clear answer right now:

    • Account under $1,000: Fixed dollar — broker lot minimums make % sizing impractical.
    • Account $1,000-$10,000: Fixed % at 0.5%-1% — small enough to compound meaningfully, large enough to absorb a 10-trade losing streak.
    • Account $10,000-$100,000: Fixed % at 1% — this is the sweet spot where compounding compounds and drawdown protection kicks in automatically.
    • Account above $100,000: Fixed % with dollar ceiling — set the ceiling at whatever absolute loss feels manageable per trade.
    • Prop firm challenges: Fixed dollar at the level that keeps your worst-day-loss safely below the daily cap, regardless of how many trades you take.

    Making the Method Match the Math

    Whichever method you pick, the calculation needs to happen automatically before every single trade. Manual recalculation is where the system breaks — markets move fast, you skip a step, and the next thing you know your “1%” trade is actually risking 4% because you eyeballed the lot size.

    A proper trading dashboard handles this in real time: you set your method (% or $), enter your stop loss, and the platform reads the instrument’s real Tick Value to calculate the correct lot size instantly. No mental gymnastics, no broker-specific lookup tables, no silent over-risking on gold and indices.

    RiskFlow Pro supports four risk modes — % Balance, % Equity, Fixed $, and % Free Margin — and switches between them with one click. Whichever method you decide fits your account today, you can run it without recalculating anything by hand.

    For a deeper look at the four risk modes, the daily drawdown protection, and the multi-level partial close that pairs naturally with fixed % sizing, the Advanced Features guide walks through each setting in detail with real examples — especially useful if you are running prop firm challenges where the choice between % and $ sizing has direct rule-compliance implications.

    Key Takeaways

    • Fixed % wins the long-term compounding contest — your bet size scales with the bankroll, both up and down.
    • Fixed $ wins for very small accounts, prop firm challenges with daily caps, and graded-setup strategies.
    • The hybrid “fixed % capped at a dollar ceiling” gives most traders the best of both above $50k.
    • Both methods break silently when applied to instruments where lot sizing math is wrong — gold, oil, indices, CFDs.
    • Never switch methods mid-streak. Lock the choice in writing and review only every 100 trades.

    Get RiskFlow Pro

    Switch between four risk modes with one click.

    % Balance, % Equity, Fixed $, % Free Margin — all calculated correctly on any instrument, any broker.

    Download Free on MQL5 →

    For prop firm setups and the four risk modes in detail, see the Advanced Features Guide.

  • Why Retail Traders Blow Accounts (It’s Not What You Think)

    Education · Risk Management · 9 min read

    Walk into any trading forum and you will see the same explanation for why retail traders lose: bad strategy, weak psychology, no discipline, fake gurus selling courses. There is some truth in all of those. But after watching hundreds of accounts blow up — including some of my own early ones — I am convinced the real reason is different, more boring, and more fixable.

    Most retail accounts do not die from a bad call. They die from a math problem the trader never sees coming.

    The Core Claim

    A trader with a coin-flip strategy and disciplined risk control survives. A trader with a 60% win rate and undisciplined risk control dies. The math does not care which side has the better edge — it cares about position size and drawdown geometry.

    The Stories We Tell Ourselves

    Ask a trader who just blew an account what happened, and you will get one of these:

    • “I held too long when the trade went against me.”
    • “I revenge-traded after a loss and dug a deeper hole.”
    • “I stopped following my system.”
    • “News killed me overnight.”

    Every one of those is technically true and emotionally satisfying. Each one places the cause inside the trader’s psychology — something to fix with more discipline, more journaling, more meditation. But none of them explain the part that actually matters: why was a single bad decision allowed to take out the whole account?

    A pilot does not crash because they made one wrong move. They crash because the wrong move was not absorbable by the system around them. Trading is the same. Bad decisions are inevitable. The question is whether your account survives them.

    The Real Killer — Drawdown Geometry

    Most traders understand losses as additive. Lose 10%, then lose another 10%, you are down 20%. Simple math. Wrong math.

    Losses are multiplicative, and the recovery required to climb back grows non-linearly. Look at the numbers:

    DRAWDOWN → RECOVERY REQUIRED

    Lose 10% → need +11.1% to break even

    Lose 25% → need +33.3%

    Lose 50% → need +100%

    Lose 75% → need +300%

    Lose 90% → need +900%

    A 50% drawdown does not mean you need 50% of profit to come back. You need to double your remaining capital. If your strategy was making 10% a year before the drawdown, recovering 50% takes — best case — about 7 years of compounding. Most traders do not have 7 years of patience.

    This is why the rule “never let a small loss become a big loss” is not just psychological advice. It is mathematical survival.

    The Three Numbers That Decide If You Survive

    Forget chart patterns for a second. Three numbers determine whether your account is structurally durable or structurally doomed:

    1. Risk Per Trade (R)

    The percent of your account you stand to lose if a single trade hits its stop loss. Not the lot size — the actual dollar risk divided by your account balance. If this number is above 2%, you are running an aggressive setup. Above 5%, you are gambling.

    2. Max Concurrent Risk

    If you have 4 positions open, all correlated (long EUR, long GBP, short USD/JPY, long XAU — guess what, those are all “short USD”), your real risk is the sum, not the individual. Most traders only track per-trade risk and get blindsided when correlated positions all hit stops together.

    3. Loss Streak Tolerance

    Every strategy has losing streaks. A 60% win-rate strategy will, mathematically, see a streak of 5 consecutive losses about once every 100 trades. A 50% strategy will see 7-loss streaks regularly. The question is: does your account survive the worst streak your strategy can produce?

    Quick Math

    At 1% risk per trade, a 10-loss streak drops you 9.6%. At 5% risk per trade, the same streak drops you 40%. Same strategy, same losses — completely different outcome.

    Why Lot Size Errors Kill Faster Than Anything

    Here is the silent account killer almost nobody talks about: traders thinking they are risking 1% when they are actually risking 5%, 10%, or more.

    This happens constantly on instruments where the trader’s mental math fails — gold, oil, indices, anything with non-standard contract sizes. A trader who has been trading EURUSD for years calculates “1% risk = X lots” automatically. Then they switch to XAUUSD, apply the same lot size, and accidentally take 8x the risk because gold’s tick value is completely different.

    The trader does not notice. They see the trade run for a while, take a normal-looking loss in pip terms, then look at the equity curve and discover they just lost 6% of the account on what was supposed to be a 1% risk trade. Do that 4 times in a week and you have lost 24% on what felt like four “small” losers.

    The Dangerous Pattern

    “My strategy stopped working” is often actually “I started trading instruments where my lot sizing was silently wrong”. The strategy is fine. The risk math broke.

    The “Catastrophic Single Trade” Problem

    There is one more pattern that kills more accounts than any other — and it is not gradual at all. It is the no-stop-loss disaster.

    A trader takes a position without a stop loss, “just to give it room.” Price moves against them. They add to the position to lower the average entry. Price moves further. They add again. By the time they finally close it, what started as a 1% normal trade has become a 40% catastrophe.

    No psychological lesson can fix this. The fix is structural: a hard stop loss attached to every position before it opens. Mental stops do not work. The only stop that works is one the broker enforces while you are not watching.

    A Realistic Survival Checklist

    If you want to give your account a chance to survive long enough for skill to compound, the structural rules are not glamorous:

    1. Risk per trade ≤ 1%. 2% only if you have a multi-year track record proving you deserve it. Beginners should be at 0.5% until they have 200 documented trades.
    2. Hard stop on every position before it opens. No “I will close it manually if it goes wrong.” You will not.
    3. Lot size calculated from real Tick Value, not estimated. Especially on gold, oil, indices, and crypto CFDs where naive math silently overstates or understates by 10x.
    4. Daily loss limit. Stop trading for the day after losing 3% of the account, no exceptions. The next day will exist. This trade does not have to.
    5. No averaging down without a pre-defined exit. Adding to losers is the fastest way to convert a bad day into a blown account.

    Notice that none of those rules are about predicting the market. They are about engineering the account to survive being wrong, which is a much more controllable problem than trying to be right.

    The Tools That Make Survival Automatic

    Most of the rules above sound easy. They are. The hard part is doing them every single trade, especially when markets move fast and emotion takes over. The reason traders skip the math is that the math takes time, and time is the one thing markets never give you when you actually need it.

    The fix is to make the math impossible to skip. If your trading platform calculates the correct lot size from your risk % automatically — reading the real Tick Value of whatever you are trading — there is no mental gymnastics required. If your platform refuses to let you place a trade without a stop loss, you cannot accidentally enter a no-stop disaster. If your platform locks trading for the rest of the day after you hit your daily loss limit, you cannot revenge trade your way to zero.

    This is exactly what RiskFlow Pro does for manual MT5 traders. It enforces the structural survival rules before each trade — correct lot size from your risk %, mandatory stop loss, daily drawdown protection — so the math errors that blow accounts simply cannot happen.

    If you want to set it up properly in under 5 minutes, the Quick Start guide walks through download, attach, configure your risk profile, and place your first properly-sized trade. It is free on MQL5 and works on any broker account.

    Honest Note

    No tool turns a losing trader into a winning one. What a tool can do is prevent the structural mistakes that kill accounts before skill has a chance to develop. That is a much smaller and more achievable goal — and the one that actually matters in year one.

    Key Takeaways

    • Most blown accounts die from drawdown geometry and silent lot-size errors, not bad strategy or weak psychology.
    • A 50% drawdown requires 100% recovery — losses compound non-linearly.
    • Three numbers decide survival: risk per trade, max concurrent risk, loss streak tolerance.
    • The biggest hidden killer is wrong lot size on non-standard instruments — same trade can risk 1% or 10% depending on whether the math is correct.
    • Every trade needs a hard stop before it opens. Mental stops do not work.
    • Tools that automate the math remove the only step that traders consistently skip when it matters most.

    Get RiskFlow Pro

    Make the structural rules automatic.

    Free MT5 dashboard that enforces correct lot size, mandatory stops, and daily drawdown protection — on every trade, every instrument.

    Download Free on MQL5 →

    Or read the Quick Start Guide first — you will be trading with proper risk controls in under 5 minutes.

  • Position Sizing 101: The Math Behind Every Trade

    Position Sizing 101: The Math Behind Every Trade

    Education · Risk Management · 10 min read

    Most traders who blow up their accounts do not lose because their strategy is bad. They lose because their position sizes are wrong. One trade too big, one stop too wide, one missed calculation on a non-standard instrument — and months of gains disappear in an afternoon.

    The good news: position sizing is math, not magic. Once you understand the formula and the three numbers that feed it, you can size any trade on any instrument correctly, every single time. This guide walks through it from first principles.

    What You Will Learn

    The one formula that works for every instrument, how to calculate each input, why gold and indices break naive lot calculators, and how to get the math right in under 5 seconds per trade.

    The Universal Position Sizing Formula

    Every correct lot size calculation reduces to a single equation. No matter what you trade — Forex, gold, oil, indices, crypto — the formula does not change:

    Lot Size = Risk $ ÷ (SL Distance × Value Per Point Per Lot)

    Three inputs. That is it. If you know how many dollars you are willing to lose on this trade, how far your stop loss sits from your entry, and how much money each point of price movement costs you on one lot — you have the answer.

    The reason traders mess this up is not the formula. It is getting those three inputs right, especially the third one. Let us break each of them down.

    Input 1 — Your Risk Amount in Dollars

    This is the easiest one. Pick your risk percentage, multiply by your account balance.

    If your balance is $10,000 and you risk 1% per trade, your risk amount is $100. That is the maximum dollar loss you will accept if this trade hits your stop loss.

    How much should the percentage be? Most professional traders and prop firm rules sit somewhere between 0.5% and 2% per trade. Below that and winners barely move your account. Above that and a normal losing streak wipes you out.

    Quick Reference

    A string of 5 consecutive losses at 1% risk drops your account 4.9%. The same 5 losses at 5% risk drops it 22.6%. This is why small percentages matter.

    Input 2 — Stop Loss Distance

    This is the distance between your entry price and your stop loss price, measured in the instrument’s smallest unit of movement. On EURUSD, that unit is typically a pip. On XAUUSD (gold), it is usually $0.01 or $0.10 depending on broker. On US30, it is 1 index point.

    The critical thing: your stop loss distance is determined by your chart analysis, not by what lot size you want to trade. If the correct technical stop is 50 pips away, that is your stop — you do not tighten it to 10 pips just to trade bigger. Tight arbitrary stops are a direct path to account death.

    Worked example on EURUSD:

    • Entry: 1.0850
    • Stop loss: 1.0820 (just below a swing low)
    • Distance: 30 pips

    Input 3 — Value Per Point Per Lot (The One People Get Wrong)

    This is where naive lot calculators — and a lot of traders — go completely off the rails. The value per point depends on the instrument, and it is not the same across your watchlist.

    For standard Forex pairs, the math is familiar:

    • 1 standard lot = 100,000 units of the base currency
    • On EURUSD, 1 pip on 1 standard lot ≈ $10
    • On GBPUSD, same — ≈ $10 per pip per standard lot
    • On USDJPY, close to $10 but varies with the USDJPY rate itself

    Plug those numbers into our formula with the EURUSD example:

    Risk $: $100

    SL distance: 30 pips

    Value per pip per lot: $10

    Lot = 100 ÷ (30 × 10) = 0.33 lots

    So a correct 1%-risk trade on a 30-pip stop at $10,000 balance is 0.33 lots. Not 1 lot. Not 0.1 lots. The math is precise.

    Why Gold, Indices, and Oil Break Naive Calculators

    This is the part that trips up traders — and where most free online lot calculators fail silently.

    On XAUUSD (gold), a “pip” is not well-defined. Different brokers quote gold with 2, 3, or even 4 decimal places. The contract size also varies — some brokers use 100 oz per lot, others use 10 oz. If you assume $10 per “pip” like on EURUSD, your risk calculation could be off by 10x.

    On US30 or NAS100 CFDs, one index point might be worth $1 per lot on one broker and $0.10 on another. Oil (Brent, WTI) is similar — contract sizes and tick values are broker-specific.

    The fix: stop thinking in pips for these instruments. Use Tick Size and Tick Value — two values your broker publishes for every instrument, and that MT5 exposes directly:

    • Tick Size — the smallest price increment (e.g. 0.01 for gold, 1.0 for US30)
    • Tick Value — the dollar value of one tick on one standard lot (e.g. $1 on gold at 100 oz lot size)

    The universal formula rewritten in these terms:

    Lot = Risk $ ÷ ((SL distance ÷ Tick Size) × Tick Value)

    This works for everything. Gold, oil, crypto CFDs, DXY, US30, Bitcoin — every instrument has a published Tick Size and Tick Value, so you just plug them in.

    Common Mistake

    Using a “gold pip calculator” from a website that assumes $1 per pip per mini lot. On a broker that uses 10-oz contracts with 2-decimal pricing, this can under-size your position by 10x — meaning your “1% risk” trade is actually risking 0.1%. The opposite error (over-sizing by 10x) blows accounts in a single trade.

    Worked Example on Gold

    Suppose your broker quotes XAUUSD with 2 decimal places (tick size 0.01), 100-oz contracts, and a tick value of $1 per tick per standard lot. You want to buy gold at 2650.00 with a stop at 2645.00 — a 5-dollar move, which is 500 ticks.

    Balance: $10,000 · Risk 1% → Risk $ = $100

    SL distance: 5.00 ÷ 0.01 = 500 ticks

    Tick value per lot: $1

    Lot = 100 ÷ (500 × 1) = 0.20 lots

    0.20 lots of gold at a 500-tick stop risks exactly $100. Every time.

    Sanity Checks Every Trader Should Run

    Before you click BUY or SELL, run these three quick checks:

    1. Is the risk dollar amount right? If your 1% risk shows as $1,000 when your account is $10k, something is off by 10x.
    2. Is the margin required reasonable? A calculated lot that requires more margin than your free margin means the position will be rejected — you need to either lower risk % or take a tighter stop.
    3. Does the lot round to the broker’s minimum step? If the formula says 0.347 lots but the broker only accepts 0.01 increments, round down to 0.34 — never up.

    The Shortcut — Automate the Math

    Doing this calculation by hand before every trade is slow and error-prone. When markets move fast, you skip the math — and that is exactly when wrong lot sizes get entered.

    The solution is to let MT5 itself handle the calculation. Every instrument in MT5 exposes its Tick Size and Tick Value through the broker’s symbol specification, so a well-written EA can read those values directly and output the correct lot size in real time — no guesswork, no broker-specific table lookups, no pip-vs-tick confusion.

    This is exactly what RiskFlow Pro does. You enter your risk %, your entry, and your stop — it reads the instrument’s real Tick Size and Tick Value from your broker and gives you the correct lot size instantly. Works on Forex, gold, oil, indices, crypto CFDs, whatever your broker offers.

    If you are new to the tool, the Quick Start guide walks you from download to your first properly-sized trade in under 5 minutes. It is free on MQL5 and works on any broker account.

    Practical Tip

    Even if you use an automated calculator, do the manual math on paper for the first 5 trades of any new instrument. This builds intuition for what “correct” looks like and helps you spot calculator errors before they hurt you.

    Key Takeaways

    • Position size is math, not opinion. One formula covers every instrument.
    • For Forex pairs, pip value thinking works. For gold, indices, oil, and CFDs, use Tick Size and Tick Value instead.
    • Your stop distance comes from chart analysis, not from what lot size feels good. Size the position to fit the stop — never the reverse.
    • Automating the math removes the single most common cause of retail blowups: wrong lot size on non-standard instruments.

    Get RiskFlow Pro

    Stop calculating lot size by hand.

    Free MT5 dashboard that does the math for you — on any instrument, any broker.

    Download Free on MQL5 →

    Or read the Quick Start Guide first — you will be trading properly-sized positions in under 5 minutes.