Tag: Trade Management

  • Position Sizing for Multiple Open Trades — The Total Heat Approach

    Education · Position Sizing · 10 min read

    Most retail traders size each position independently. They calculate 1% risk for the EURUSD setup, calculate 1% risk for the Gold setup, calculate 1% risk for the indices setup — and consider the math done. The problem is that “1% per trade” is not the same as “1% per moment in time.” When three positions are open simultaneously, your actual exposure is the combined heat of all three, not the per-position number you calculated separately.

    Professional risk managers solve this with a concept called total heat — the sum of all open risk at any given instant. Total heat is what determines whether a single bad market regime can wipe out a quarter of trading work, and it is the single most underappreciated number in retail position sizing.

    The Core Insight

    Per-trade sizing is local risk management. Total heat is account-level risk management. A trader who only does the local math is implicitly trusting the market to never align all their positions against them at once — and the market does not deserve that trust.

    What Total Heat Actually Is

    Total heat at any moment equals the sum of the maximum loss possible on every open position, including stops and accounting for correlation. If you have three trades open, each risking 1%, your nominal heat is 3%. But if those three trades are correlated (which is usually the case for retail traders, as discussed in Multi-Symbol Correlation Risk), your effective heat during a stress event can be 4-5%.

    The mental shift this article advocates: treat your account, not each trade, as the unit being risk-managed. Per-trade sizing is one input. The cap on total simultaneous heat is the other. You need both.

    The Two Drawdown Limits That Define Total Heat

    Before you can pick a total heat cap, you need to know how it interacts with the two drawdown limits that matter for any account — daily and maximum.

    Daily Drawdown Limit

    The maximum loss you can take in a single trading day before your strategy considers the day a failure (or, for prop firm accounts, before the firm closes your account). This is typically 3-5% of starting balance for a self-directed trader, or set by the firm for funded accounts. The full math of how this interacts with risk per trade is covered in The Drawdown Math Every Prop Firm Trader Should Know.

    Maximum Drawdown Limit

    The peak-to-trough decline your strategy can survive without psychologically breaking you or fundamentally invalidating the system. For most retail traders this is 15-20%; for prop firm accounts it is typically 10%.

    Total heat must always be smaller than your daily drawdown limit. If your daily limit is 5% and you have 6% of total heat open simultaneously, a single correlated stress event can breach your daily limit in one move. The math is simple: total heat caps the worst-case daily loss you can structurally experience.

    TOTAL HEAT vs DAILY LIMIT — $10K ACCOUNT

    Daily drawdown limit : 5% = $500

    Safe total heat budget : ~3% = $300 (60% of daily)

    Buffer for slippage etc : ~2% = $200 (40% of daily)

    → Never let open heat exceed 60% of daily limit

    The Three-Layer Heat System

    A practical total heat system has three layers, each catching different failure modes:

    Layer 1: Per-Trade Cap

    No single trade risks more than X% of account. This is the layer most retail traders are familiar with — typically 0.5% to 1.5% per trade. The math behind sizing each trade correctly is covered in Position Sizing 101. This layer protects you against any single trade going maximum bad.

    Layer 2: Per-Cluster Cap

    No single correlation cluster (dollar pairs, risk-on basket, commodity basket) risks more than Y% of account at any moment. This caps the damage when correlated positions all move against you simultaneously. A reasonable rule: no more than 2% combined risk per cluster.

    Layer 3: Total Account Heat Cap

    The sum of all open risk across all positions and all clusters cannot exceed Z% of account at any moment. Z should be set to roughly 60% of your daily drawdown limit, leaving 40% as buffer for slippage, gap risk, and unexpected correlation between clusters during major macro events.

    THREE-LAYER HEAT SYSTEM — TYPICAL CONFIG

    Layer 1 (per trade) : 0.5% – 1%

    Layer 2 (per cluster) : 2%

    Layer 3 (total heat) : 3% (= 60% of 5% daily)

    All three layers must hold simultaneously. If you already have 3% total heat open and a fourth setup appears, you cannot add it — even if individually it would only be 0.8% (passing Layer 1) and the cluster has room (passing Layer 2). Layer 3 takes precedence over the others.

    Working a Real Example

    Imagine a trader with a $10,000 account, 5% daily limit, three-layer heat system configured as: 1% per trade, 2% per cluster, 3% total heat. It is Tuesday morning. The trader sees four setups develop in sequence.

    Setup 1 — EURUSD long, 1% risk. Open. Total heat now 1%. Dollar cluster heat 1%.

    Setup 2 — GBPUSD long, 1% risk. Same dollar cluster as EURUSD. Cluster heat would become 2% — exactly at the cap. Allowed. Open. Total heat now 2%.

    Setup 3 — XAUUSD long, 1% risk. Different cluster (commodities). Cluster heat 1%. Total heat would become 3% — exactly at the total heat cap. Allowed. Open. Total heat now 3%.

    Setup 4 — US30 long, 1% risk. Different cluster (risk-on). Cluster heat 1%. Total heat would become 4% — exceeds the 3% total heat cap. Blocked, even though each individual layer (per-trade, per-cluster) would allow it. Either pass on the trade or wait for one of the existing positions to close before adding this one.

    The Critical Habit

    When total heat is full, missing a trade is correct behavior, not a missed opportunity. There will be more setups. The system that says “no” to setup 4 is the same system that prevents your account from blowing up on a Tuesday morning when all four setups happen to be the same macro bet you did not notice.

    How Heat Decays as Trades Mature

    A subtle but important point: total heat is not static. It decreases as trades move into profit and you adjust stops forward. A trade entered at 1% risk that has moved +1R with stop trailed to breakeven now contributes 0% to your total heat — the maximum possible loss is now zero.

    This means your effective heat capacity grows during winning periods. If three trades all move into +1R territory and you trail stops to breakeven on each, your total heat drops from 3% back to 0%, freeing room for new setups. This is the reward for trade management discipline: more capacity to take new trades comes from properly managing the trades you already have.

    The same logic works the other way: if you do nothing while trades move favorable, your heat stays at the original level even when the actual probabilistic risk is much lower. Trade management discipline directly converts into available risk capacity. The trade-offs of when to move stops to breakeven are covered in Breakeven Stops: When to Move, When to Wait.

    The Three Tests to Apply Before Each New Position

    Before opening any new trade, mentally run through these three checks. They take ten seconds and prevent the kind of compounding mistakes that destroy retail accounts.

    • Test 1 (per-trade): Is this trade sized within my single-trade cap? If yes, proceed to Test 2.
    • Test 2 (cluster): Adding this trade, what is my total exposure to its correlation cluster? If still within the 2% cluster cap, proceed to Test 3.
    • Test 3 (total heat): Adding this trade, what is my total open heat across all positions? If still within the 3% total heat cap, take the trade. If not, skip.

    The Honest Assessment

    Most retail traders do Test 1 only. Adding Test 2 and Test 3 sounds like overhead — but those two tests are what separate disciplined account-level risk management from per-trade gambling. The trader who passes all three tests on every trade rarely blows up; the trader who passes only Test 1 eventually always does.

    Practical Implementation in Real Time

    Tracking total heat manually requires you to maintain a mental running total of every open trade’s risk, recalculate when stops move, and recheck before every new trade. Most retail traders will do this for a week and then quietly stop, especially during volatile sessions when the mental load is highest.

    The pragmatic alternative is to automate the tracking. A trade management tool that displays current total heat alongside live P&L removes the manual computation step. Instead of “what was my exposure again?”, the answer sits on the screen.

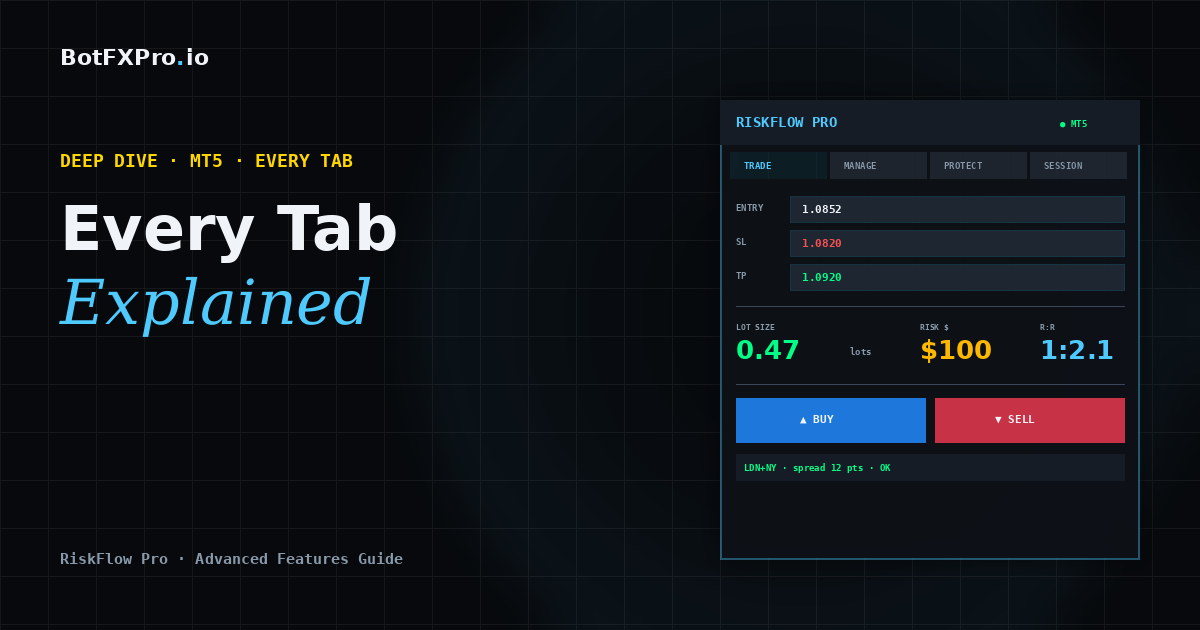
    RiskFlow Pro includes a multi-symbol monitor that shows every open position with its current risk, accumulated total exposure, and live spread per instrument. Combined with daily drawdown protection that caps your worst-case loss for the day, you get the full three-layer system enforced structurally rather than mentally — the platform refuses to take a trade if it would breach your configured limits, removing the human failure mode entirely.

    For the multi-symbol monitor walkthrough, the four risk modes that match different account profiles, and how the daily limit interacts with concurrent positions, the Advanced Features guide covers each tool with worked examples.

    Common Mistakes

    • Counting open profit as reduced risk before stops are moved. A trade that is +$200 unrealized is still risking the original stop-out amount until you actually move the stop forward. Open profit is not the same as locked-in profit. Heat does not decrease just because the trade is currently green.
    • Adding to winners without rebalancing heat. “Pyramiding” into trends sounds disciplined, but each addition increases total heat. If your original heat budget was 3%, adding a second leg at +1R re-uses heat capacity that you only freed up by moving the original stop forward.
    • Treating heat budget as a target, not a cap. Just because you have room for 3% total heat does not mean you must always run 3%. Many of the most consistent retail traders run 1-2% average heat and only push to 3% when there are several uncorrelated A+ setups simultaneously.
    • Forgetting cross-cluster correlation during macro events. During major macro events (Fed surprise, geopolitical shock), historically uncorrelated clusters become highly correlated for hours. A “diversified” portfolio can become a single bet during these windows. Adjust by reducing target heat in the days surrounding scheduled macro events.
    • Resetting heat tracking at session boundaries. Heat is a continuous concept across sessions. A position carried overnight contributes to the next session’s heat exactly as much as a fresh entry — sometimes more, because overnight gap risk widens the effective stop.

    Key Takeaways

    • Per-trade sizing is local risk management; total heat is account-level risk management. You need both.
    • Total heat = sum of all open risk across every position, accounting for correlation between positions.
    • Set total heat cap at roughly 60% of your daily drawdown limit, leaving 40% buffer for slippage and gap risk.
    • Three-layer system: per-trade cap (1%), per-cluster cap (2%), total heat cap (3%) on a typical 5% daily limit account.
    • All three layers must hold simultaneously. The strictest one wins.
    • Heat decays as trades mature and stops move forward, freeing capacity for new setups — this is the structural reward for trade management discipline.
    • Apply three tests before every new position: per-trade, per-cluster, total. Skip the trade if any test fails.
    • Automate the tracking — manual heat math always breaks down within a few weeks of live trading.

    Get RiskFlow Pro

    See total heat in real time. Stop guessing your real exposure.

    Multi-symbol monitor with live total risk tracking. Daily drawdown enforcement. Free MT5 dashboard, any broker, any instrument.

    Download Free on MQL5 →

    For the multi-symbol monitor walkthrough, read the Advanced Features Guide.

  • Partial Close: Where to Set Each Level (and Why Most Traders Set Them Wrong)

    Education · Trade Management · 9 min read

    Most retail traders set partial close levels the same way they set entry triggers — by intuition. Some close half at +1R because that “feels right.” Others close a third at +2R because they read it in a book. Almost nobody does the math on what their specific partial close structure actually does to their expected return.

    The hard truth: most retail partial close strategies are mathematically destructive. They feel safe because they “lock in profit early.” They reduce overall expectancy because they cut winners before the trade math has a chance to compound.

    The good news is that the math is not complicated. Once you see it laid out, picking the right partial close levels for your specific strategy becomes a simple matching problem rather than guesswork.

    The Core Insight

    Partial close levels should be set based on your strategy’s R-distribution, not on round numbers. If your average winner runs 3R, closing half at +1R kills two-thirds of the trade’s expected value. If your average winner runs 1.2R, holding the full position past +1R is fighting the natural exit point.

    What Partial Closes Actually Do to Expectancy

    Most traders treat partial closing as “free profit” — bag some R now and let the rest run. The math says otherwise. Every partial close has a real cost in lost expectancy on the closed portion of the position.

    Take a strategy with 50% win rate and average winner of +3R. Without partial closes, the math is straightforward:

    NO PARTIAL CLOSE — 100 TRADES

    50 winners x +3R = +150R

    50 losers x -1R = -50R

    Net per 100 trades : +100R

    Now imagine the trader closes 50% of the position at +1R and lets the rest run to +3R. They feel like they “locked in profit early.” But the actual math:

    50% CLOSE AT +1R — 100 TRADES

    50 winners: half at +1R, half at +3R = 50 x (0.5 + 1.5) = +100R

    50 losers x -1R = -50R

    Net per 100 trades : +50R (half of no-partial)

    Closing half at +1R cut total expectancy by 50% — even when the strategy is exactly the same and every winning trade still goes to +3R. The “safety” of locking in early profit was paid for with half the strategy’s edge.

    This is the core trap: partial closes feel like they reduce risk, but on a strategy that already wins 50% with 3R winners, they only reduce profit. The “risk reduction” exists only when winners regularly retrace from +1R back to losses — and that is a strategy problem, not a partial-close problem.

    When Partial Closes Genuinely Add Value

    Partial closes are not always destructive. They are mathematically positive in three specific scenarios — and disastrous outside those scenarios.

    1. High Retracement-To-Reversal Rate

    If your strategy frequently has trades that hit +1R, then retrace, and ultimately end as losers, partial closes genuinely save expectancy. A trade that goes to +1R, then back to -1R full position is a -1R loss. The same trade with 50% closed at +1R becomes 0.5R win + 0.5R loss = breakeven. The partial close converts losses into breakevens — that is real value.

    The diagnostic question: “Of my last 50 trades that touched +1R, how many ended below entry?” If more than 25%, partial close at +1R adds expectancy. If less than 10%, partial close at +1R subtracts expectancy.

    2. Long-Tail Winner Distribution

    If your strategy occasionally has massive 5R, 8R, or 10R winners but most winners are 1.5R-2R, partial closing at the modal winner level (+1.5R) and letting a small portion run captures both the typical move and the outlier moves. The structure: close 70% at +1.5R, let 30% trail with ATR. Most trades exit cleanly at the typical level. The 5% of trades that turn into runners pay disproportionately because the runner portion catches the full upside.

    3. Prop Firm Daily Limit Pressure

    In prop firm challenges with tight daily limits, locking in profit early reduces the risk that a winning day turns into a losing day. The expectancy cost is real, but the benefit (avoiding daily limit breach during pullbacks) outweighs the cost specifically because the firm penalizes drawdown asymmetrically. This is the same logic discussed in The Drawdown Math Every Prop Firm Trader Should Know — within prop firm constraints, optimal trading is not the same as expectancy-maximizing trading.

    Pattern To Notice

    Each scenario above involves an asymmetry that partial closing specifically addresses — high reversal rate, fat-tail distribution, or external risk constraints. Outside these scenarios, partial closing usually just trades expectancy for emotional comfort.

    The Three Common Structures (And When Each Fits)

    Most experienced traders converge on one of three structures. Picking the right one for your strategy is more important than tuning the exact percentages.

    Structure A: Aggressive (50/50 at +1R)

    Close 50% at +1R, let the rest run to a defined target or trail. Best for: strategies with high reversal-to-loss rate (>30%), prop firm challenges, breakout strategies that often fade after first pop.

    +1R : Close 50% · Move stop to BE

    +target/trail : Close remaining 50%

    Structure B: Three-Step (33/33/34)

    Close a third at +1R, a third at +2R, last third trails. Best for: trend-following strategies with variable winner sizes, multi-instrument portfolios, and traders who want a balance between locking profit and capturing runners.

    +1R : Close 33% · Move stop to BE

    +2R : Close 33% · Move stop to +0.5R

    +trail : Close remaining 34%

    Structure C: Runner-Heavy (75/25 at +2R)

    Close 75% at +2R, let 25% run with wide trail. Best for: strategies with rare but huge winners (long-tail distribution), trend-following on H4/Daily, position trading. The bulk of trades close at a respectable level; the small remainder catches the home runs that make the year.

    +2R : Close 75% · Move stop to +1R

    +trail (ATR x 3) : Close remaining 25%

    Notice that all three structures pair partial closes with progressive stop moves — this is not optional. Closing partial without moving the stop forward defeats the purpose because the open portion still carries full original risk. The combination of breakeven stop moves with partial closes is what creates the multi-level protection most professionals use.

    For the trailing stop portion of the remaining position, the choice between fixed-pip and ATR depends on your instrument and timeframe — the trade-offs are covered in detail in ATR Trailing vs Fixed Pips.

    The Common Mistakes

    A few patterns destroy partial close performance regardless of which structure you pick:

    • Round-number triggers without strategy match. “+1R, +2R, +3R” is convenient mental shorthand, not strategy-derived levels. If your strategy’s modal winner is 1.7R, putting your first close at +1R cuts the trade right before the typical exit point.
    • Same percentage on every instrument. XAUUSD’s typical winner profile is completely different from EURUSD’s. The structure should reflect each instrument’s R-distribution, not a single rule across everything.
    • Closing too small a percentage. 10-20% partial closes are usually pointless — too small to meaningfully protect profit, too large to ignore. Either close 33% or more, or do not partial close at all.
    • Closing without moving the stop. A partial close at +1R while leaving the stop at the original distance does not “lock in profit” — the remaining open position still carries the full original loss potential. Always pair partial close with stop progression.
    • Manual partial close timing. The same execution problem as breakeven and trailing — markets move fast, you miss the level by 5 ticks, and the partial close fires at +0.95R or +1.1R depending on slippage. Either automate or expect inconsistent execution.

    The Decision Framework

    A simple decision tree that handles 90% of cases:

    • Strategy with R:R below 1:2 → Skip partial closes. Just take the full target.
    • Strategy with R:R 1:2 to 1:3, high reversal rate → Structure A (50% at +1R).
    • Trend-following with R:R 1:3+ → Structure B (33/33/34) or Structure C (75/25).
    • Position trading with rare 5R+ winners → Structure C, weighted toward letting the runner run.
    • Prop firm challenge → Structure A, with the partial close size chosen to keep daily losses below 60% of the firm’s daily limit even if the open portion stops out.

    The Honest Test

    Before committing to any partial close structure, run it against your last 100 closed trades two ways: with the partial structure, and without it. If the partial structure produces lower total R, drop the partial close entirely — it is costing you more than it is saving. This calculation often surprises traders who thought partial closes were obviously good practice.

    Making Partial Close Mechanical

    As with breakeven and trailing stops, the failure mode for partial close is rarely the rule itself — it is execution. Manual partial close means watching every position, calculating the exact lot size to close, hitting the close-partial button at the right R level. No human does this consistently across multiple positions during volatile sessions.

    A trade management EA that knows your entry, stop, and configured close levels removes the only step that traders consistently miss. You set the structure once (50% at +1R, 25% at +2R, etc.) and the EA executes it on every trade automatically — same level, same percentage, same stop progression, every time.

    RiskFlow Pro includes a multi-level partial close that supports up to three close levels with independent percentages and stop-progression rules per level. Combined with breakeven, ATR trailing, and daily drawdown protection, you get the full multi-level structure that professionals use without any manual button-pushing.

    For the partial close configuration walkthrough — including how the levels interact with the breakeven trigger and ATR trailing on the runner portion — the Advanced Features guide covers each setting in detail with worked examples.

    Key Takeaways

    • Partial closes are not free profit — they cost real expectancy on the closed portion.
    • Use partial closes only when there is a specific asymmetry: high reversal rate, fat-tail distribution, or external constraints like prop firm limits.
    • Three common structures: 50/50 at +1R, three-step 33/33/34, runner-heavy 75/25 at +2R.
    • Always pair partial closes with stop progression — closing partial without moving the stop is mostly pointless.
    • Match levels to your strategy’s R-distribution, not to round numbers.
    • Backtest with and without your partial close structure on 100 trades — keep it only if it improves total R.
    • Automate the execution. Manual partial close is the second most-skipped trade management rule after breakeven.

    Get RiskFlow Pro

    Three-level partial close, automated.

    Set the structure once. Apply it to every trade automatically. Free MT5 dashboard, any broker, any instrument.

    Download Free on MQL5 →

    For the full partial close + breakeven + ATR trail walkthrough, read the Advanced Features Guide.

  • ATR Trailing vs Fixed Pips: Which Trailing Stop Actually Works?

    Education · Trade Management · 9 min read

    Trailing stops are one of the most universally recommended trade management tools in retail trading — and one of the most poorly implemented. Almost everyone agrees that “letting winners run while protecting profit” is the goal. Almost no one agrees on how to do it.

    Two methods dominate: ATR-based trailing, where the stop distance scales with current market volatility, and fixed-pip trailing, where the stop sits a constant distance behind price. Both have evangelists. Both have very real strengths. And applied to the wrong setup, both can quietly destroy what would have been your best trades.

    The Core Insight

    Fixed-pip trailing is a blunt instrument optimized for one specific market regime. ATR trailing is a self-adjusting tool that adapts to whatever the market gives you. The right choice depends on whether your edge cares about market regime — and whether you trade the same instrument in all conditions or change with volatility.

    How Each Method Actually Works

    Before debating which is better, the precise mechanics matter — because most traders use one of these without really understanding what it is doing tick by tick.

    Fixed-Pip Trailing

    You set a constant distance — say 30 pips. Every time price makes a new favorable extreme, the stop moves up (long) or down (short) to maintain exactly that 30-pip gap from the new high or low. The distance never changes regardless of how the market is behaving.

    Long EURUSD entered at 1.0850, fixed trail = 30 pips

    Price moves to 1.0900 · stop moves to 1.0870

    Price moves to 1.0950 · stop moves to 1.0920

    Price retraces to 1.0935 · stop unchanged (one-way only)

    ATR-Based Trailing

    You pick an ATR period (commonly 14) and a multiplier (commonly 2 or 3). The stop sits at price – (ATR × multiplier) for longs, recalculated as ATR updates. When volatility expands, the trailing distance widens automatically. When volatility contracts, the distance tightens. The percentage gap between price and stop responds to what the market is doing right now.

    Long XAUUSD at 2650, ATR(14) = 8 dollars, multiplier = 2

    Initial trail distance : 16 dollars (= 2 x 8)

    Volatility doubles, ATR=16 : trail widens to 32 dollars

    Volatility halves, ATR=4 : trail tightens to 8 dollars

    Notice the structural difference: fixed-pip is geometry-based (constant distance), while ATR is condition-based (responds to current volatility). This is the entire reason one might be better than the other in different scenarios.

    When Fixed-Pip Trailing Wins

    Despite all the textbook praise for ATR-based methods, fixed-pip trailing is genuinely better in three specific scenarios. Knowing when to reach for it is more valuable than picking a side.

    1. Stable, Range-Bound Markets

    When you trade an instrument that has predictable, stable volatility — major Forex pairs during normal sessions, for example — ATR’s responsiveness becomes noise rather than signal. Small ATR fluctuations cause small stop adjustments that rarely improve the trade outcome but add complexity. A simple fixed pip distance, calibrated to the pair’s average daily range, captures the same protection with cleaner mental model.

    2. Strategies with Defined Targets

    If your strategy already exits at a specific R-multiple or chart structure (resistance, prior swing high, fibonacci extension), fixed trailing’s role is just to protect what you have until the planned target hits. You do not want the stop wandering around with volatility — you want it sitting at a predictable distance behind price so the trade exits cleanly at your target without random noise stopping you out first.

    3. Lower Timeframes with Tight Spreads

    On the 5M and 15M chart, ATR can fluctuate dramatically within a single session as small bursts of volatility come and go. ATR trailing with a typical 14-period setting will widen the stop right when you want it tight (during clean trends) and tighten it during chop (when you want some breathing room). Fixed-pip avoids the whipsaw entirely.

    Practical Note

    Fixed-pip trailing also has a psychological advantage: you always know exactly where your stop is going to sit at the next price tick. This predictability helps with discretionary management decisions like “should I close manually now?” because the math is in your head, not on a chart indicator.

    When ATR Trailing Wins

    ATR’s adaptiveness becomes a real edge in specific market conditions where fixed-pip stops would either get whipped out or give back too much profit.

    1. Trending Markets with Volatility Expansion

    When a clean trend develops on Gold, oil, or indices, volatility typically expands as the trend matures. A fixed 30-pip trail set for normal conditions will be too tight by the time the trend is in full swing — you will get stopped out by routine intraday pullbacks during what should be your biggest winners. ATR widens the stop in lockstep with the expanding range, giving the trend the room it needs.

    2. Multi-Instrument Trading

    If you trade EURUSD, XAUUSD, USOIL, and US30 in the same session, fixed-pip stops require completely different settings for each (30 pips on EURUSD, 80 on Gold, 200 on US30 — meaningless across instruments). ATR-based stops use the same multiplier across everything; the indicator handles the per-instrument calibration automatically. This is huge for portfolio traders.

    3. Higher Timeframes with Wide Daily Ranges

    On the H4 and Daily chart, daily volatility cycles are much more pronounced. A trade that you opened during a quiet week and held through a CPI announcement experiences a 3-4x volatility expansion that ATR captures gracefully. Fixed-pip stops have no way to respond — either they were too wide for the quiet phase (giving back too much) or too tight for the noisy phase (stopping you out on noise).

    The Honest Assessment

    For most retail traders running multi-instrument strategies on H1 and above, ATR is the structurally better choice. The mental simplicity of fixed-pip is real but rarely worth the cost of being wrong about the market regime.

    The ATR Settings That Actually Matter

    Most ATR trailing failures come from misconfiguring the indicator, not from ATR being wrong. Two parameters do all the work:

    Period

    Default is 14, which means “average true range over the last 14 candles.” Shorter periods (7-10) make ATR more reactive — good for fast-moving instruments and lower timeframes. Longer periods (20-30) smooth the noise — good for slow-moving instruments and longer timeframes. The most common mistake is using 14 on every timeframe, which makes ATR too jumpy on M15 and too sluggish on Daily.

    Multiplier

    The multiplier is where most fine-tuning happens. The standard rule of thumb:

    ATR MULTIPLIER GUIDE

    Aggressive trail (scalp) : 1.0 – 1.5x ATR

    Standard trend-follow : 2.0 – 2.5x ATR

    Wide trail (let it breathe): 3.0 – 4.0x ATR

    Default sweet spot : ATR(14) x 2

    Pick the multiplier based on what you are trying to capture. If you want to ride 4R+ moves and survive normal pullbacks, use 3x. If you want quick exits to lock in 1.5R, use 1x. The same trade with different multipliers produces completely different equity curves — even though the underlying signal logic is identical.

    The Hybrid Approach Pros Use

    Experienced traders rarely use either pure fixed-pip or pure ATR. The structure that consistently outperforms both is a phased trail that switches methods based on trade phase:

    PHASED TRAILING — REAL-WORLD STRUCTURE

    Phase 1 (entry to +1R) : Initial fixed stop, no trail yet

    Phase 2 (+1R to +2R) : Fixed-pip trail, BE + small offset

    Phase 3 (+2R to +4R) : Switch to ATR(14) x 2 trail

    Phase 4 (+4R+) : ATR(14) x 3 — give it room

    This handles both the early-trade need for tight risk control (where fixed-pip is cleaner) and the late-trade need for volatility-adapted protection (where ATR shines). The transition between phases happens automatically based on R-multiples, not on trader judgment.

    Common Mistakes With Both Methods

    A few patterns destroy trailing stop performance regardless of method:

    • Trailing too early. Both methods need a small profit cushion before activating, otherwise normal entry-level noise stops you out. A reasonable rule: do not start trailing until at least +1R is reached.
    • Removing the trail to hold a winner longer. The instinct is “this trade looks great, let me give it more room.” This is the same psychological trap as removing breakeven mid-trade. The trail rule exists to protect you from your future self — overriding it always pays the price eventually.
    • Using the same settings everywhere. The 30-pip trail that works on EURUSD is laughably tight on XAUUSD and absurdly wide on AUDNZD. Fixed-pip needs per-instrument calibration; ATR handles this automatically.
    • Ignoring spread cost in the trail distance. Your effective trail is always (set distance + current spread). On wide-spread instruments during news, a 30-pip trail can become a 50-pip trail temporarily. ATR handles this implicitly because spread widens during volatility expansion. Fixed-pip needs explicit padding.
    • Manual implementation. The same execution problem as breakeven — manual trailing means watching every tick on every position. No human does this consistently. Either automate it or do not bother.

    Decision Framework

    A practical rule that handles 90% of cases:

    • Single major Forex pair on M15-H1 → Fixed-pip is fine. Calibrate to roughly 25-40% of the pair’s average daily range.
    • Multi-instrument basket (Forex, Gold, indices) → ATR. Same multiplier across everything.
    • Trend-following on H4 / Daily → ATR with multiplier 2.5-3. Volatility cycles are too pronounced for fixed-pip to work.
    • Scalping on M1 / M5 → Fixed-pip with very tight setting (8-15 pips). ATR adds noise at this granularity.
    • Trade-through-news strategy → ATR. The whole point is volatility-adaptive protection.
    • Defined-target strategy with chart structure exit → Fixed-pip. The trail is just protection until the planned exit triggers.

    Backtesting Both — The 100-Trade Test

    If you are not sure which method fits your strategy, the answer is in your own historical trades. Run this test on your last 100 closed positions:

    • Reconstruct each trade with no trailing — what did it actually achieve?
    • Reconstruct it with a 30-pip fixed trail activated at +1R — what would the outcome have been?
    • Reconstruct it with ATR(14) x 2 trail activated at +1R — what would the outcome have been?
    • Compare total R captured across all three approaches.

    For most retail traders, the result surprises them: ATR captures more R total but with higher variance — some trades become huge winners, others get stopped out earlier. Fixed-pip captures less total R but with smoother distribution. The “right” answer depends on whether your psychology can tolerate the variance — a perfectly good system that you stop following because of three painful trades is worse than a slightly suboptimal one you stick with.

    Making the Trail Mechanical

    As with breakeven and partial close, the failure mode for trailing stops is rarely the rule itself — it is execution. Manual trailing means watching every position every tick, hitting the modify button at the right moments, recalculating ATR mentally as candles close. No human does this on 4 positions across 4 instruments simultaneously. Even experienced traders skip it during busy sessions.

    The fix is automation. A trade management EA that calculates the trail distance — fixed pips, ATR, or a phased combination — and updates the stop on every tick removes the only step that traders consistently miss. The math is enforced by the platform, not by your willpower at minute 47 of a frustrating session.

    RiskFlow Pro includes both modes — fixed-pip trailing and ATR-based trailing — switchable per setup. You set the period and multiplier once, and the EA applies the trail to every position automatically across any instrument. Combined with breakeven and multi-level partial close, you get the full phased trade management structure described above without any manual button-pushing.

    For the full Manage tab walkthrough — how trailing interacts with breakeven, partial close, and the daily drawdown protection that keeps you compliant with prop firm rules — the Advanced Features guide walks through each setting in detail with worked examples.

    Key Takeaways

    • Fixed-pip trailing is geometry-based; ATR trailing is condition-based. Each fits different market regimes.
    • Use fixed-pip for stable single-pair Forex, defined-target strategies, and lower-timeframe scalping.
    • Use ATR for multi-instrument baskets, trend-following on H4/Daily, news-active trading, and volatile instruments.
    • Standard ATR settings: period 14, multiplier 2 — adjust multiplier to taste (1x for tight, 3x for wide).
    • The phased approach (fixed-pip early, ATR later) outperforms either pure method for most strategies.
    • Backtest both on your last 100 trades — the right answer is the one your psychology can stick with.
    • Always automate the trail. Manual trailing is the most consistently broken rule in retail trading.

    Get RiskFlow Pro

    Fixed-pip and ATR trailing — switchable per setup.

    Set the rules once. Apply them to every trade automatically. Free MT5 dashboard, any broker, any instrument.

    Download Free on MQL5 →

    For the full trailing-stop walkthrough alongside breakeven and partial close, read the Advanced Features Guide.

  • Breakeven Stops: When to Move, When to Wait

    Education · Trade Management · 8 min read

    Moving your stop loss to breakeven feels like the responsible thing to do. The trade is in profit, the worst case is now zero loss, and you can sleep at night. Every trading book repeats some version of “always protect your capital first.”

    But here is what nobody mentions: aggressive breakeven moves are also one of the most common reasons traders bleed equity in trending markets. The trade you stopped out at breakeven yesterday is the same trade that ran 8R today — without you. Multiply that mistake across a year and “responsible risk management” turns into a slow drain on your equity curve.

    The real skill is not knowing how to move stops to breakeven. The real skill is knowing when to move them — and when to leave them alone.

    The Core Trade-Off

    Every breakeven move trades drawdown protection for expected value. Move too early and you cap winners at zero. Move too late and you give back open profits. The right answer depends on your strategy, your timeframe, and what the market is actually doing right now — not on a fixed rule.

    What “Breakeven” Actually Means

    A breakeven stop moves your stop loss from its original level to your entry price (plus or minus a small offset to cover spread and commission). Once moved, the trade can no longer lose money — but it can no longer be a “breakeven loser” either, because the stop now sits in front of price action that would otherwise still be normal market noise.

    Breakeven is almost always triggered at a multiple of your initial risk distance, expressed in R-multiples:

    Entry: 1.0850 · Initial SL: 1.0820 · R = 30 pips

    Trigger BE at 1R → when price hits 1.0880, move SL to 1.0850

    Trigger BE at 0.5R → when price hits 1.0865, move SL to 1.0850

    The trigger R is the variable that changes everything. Move at 0.5R and you protect against more drawdown, but get stopped out frequently on normal pullbacks. Move at 2R and you let trades breathe, but give back more open profit when winners reverse.

    When to Move Aggressively (Early)

    There are specific situations where moving to breakeven at 0.5R or 1R makes mathematical sense. They share one common feature: the strategy does not depend on catching big runners.

    Scalping and short-term mean reversion

    If your average winner is 1.5R and you take 5+ trades per day, you do not need any single trade to run to 5R. A 0.5R-1R breakeven move protects you from intraday reversals that would otherwise turn 70% of your “almost winners” into full losers. The cost (capping a few runners) is small relative to the benefit (preserving high win rate).

    News-driven trades

    When you enter on a news catalyst, the reason for the trade has a known expiration. Once price has moved 1R in your direction, the news edge is mostly priced in — anything beyond that is just market noise. Moving stops aggressively prevents you from giving back the news pop when liquidity returns to normal.

    Prop firm challenges

    When you are 2 winning trades away from passing FTMO Phase 1 and one losing trade away from blowing it, the math changes completely. Locking profits at 1R becomes more valuable than chasing 3R wins. The asymmetry of “pass or fail” overrides the asymmetry of “winners pay for losers.”

    Quick Heuristic

    If your strategy expects average winners under 2R, move stops to breakeven at 1R. If you expect winners to average 3R+, wait until 1.5R-2R before moving — or skip breakeven entirely and use a wider trailing stop.

    When to Wait (or Skip Breakeven Entirely)

    The opposite case — where aggressive breakeven moves actively hurt your edge — happens more often than most traders realize.

    Trend-following and breakout strategies

    If your strategy depends on catching the occasional 5R-10R move to make a profit (think trend following, breakout trading), moving to breakeven at 1R is statistically equivalent to throwing away your edge. The math: in trending strategies, the winners that cover all your losers are the ones that go past 3R. If you cap them at breakeven on every normal pullback, you eliminate the only trades that pay your bills.

    Trend strategy: 35% win rate, average winner 4R

    Without BE: 35% x 4R – 65% x 1R = +0.75R per trade

    With BE@1R that triggers on 30% of winners that pull back:

    Net edge collapses from +0.75R to under +0.30R per trade

    Same strategy, same trades, same market — half the expected value. The breakeven move did not protect anything; it just moved the loss from “small loss on a stop-out” to “missed gain on a winner that reversed temporarily before continuing.”

    Higher-timeframe swing trades

    On a daily or weekly chart, “1R” might represent a multi-day move. Moving stops to breakeven the moment price hits 1R means stopping out on normal intraday volatility. Swing trades need room to breathe — typically waiting until 2R-3R before any stop adjustment, and then trailing rather than locking flat.

    Strategies with edge in pullbacks

    Some strategies actually expect price to retrace 30-50% before continuing. If your entry method exploits this pattern, moving to breakeven at 1R puts your stop directly in the path of normal expected behavior. You will get stopped out, then watch price continue exactly as your strategy predicted — without you in the trade.

    The Offset That Most Traders Forget

    When the EA or platform moves your stop “to breakeven,” it usually places it exactly at your entry price. This sounds correct, but in practice creates a hidden loss every single time it triggers.

    Why? Because spread and commission still apply. A buy entry at 1.0850 with a stop at 1.0850 will close at the bid (~1.0848 with a 2-pip spread), giving you a small loss. Add commission and you might be losing $5-$15 per “breakeven” trade. Run that across 200 trades a year and your “loss-free” stops cost you $1,000-$3,000.

    The fix is simple: configure breakeven to move the stop to entry plus an offset — usually 2-5 pips for Forex pairs, larger for instruments with wider spreads (gold, indices, oil). The offset covers the spread and commission, ensuring “breakeven” actually means breakeven.

    Buy at 1.0850, spread 2 pips, commission $7

    SL at exact entry 1.0850 → triggers at 1.0848 → -$27 net

    SL at entry + 5 pip offset 1.0855 → triggers at 1.0853 → +$23 net

    Multi-Level Breakeven — The Underrated Technique

    The biggest leap in stop management beyond single-trigger breakeven is using multiple levels. Instead of one binary “BE on at 1R” decision, you stage protection in tiers:

    • Level 1 at 1R: Move SL to entry + small offset (true breakeven).
    • Level 2 at 2R: Move SL to +0.5R (lock half the original risk as profit).
    • Level 3 at 3R: Move SL to +1.5R (lock 1.5x your risk regardless of what happens next).

    Each level fires once and never moves backward. The result: you keep your stop wide enough to let trades breathe early, but progressively tighter as the trade matures. This is the structural setup professional traders use because it captures both runner-friendly behavior at the start and aggressive profit protection toward the end.

    Practical Tip

    Multi-level breakeven only works if it executes automatically and only once per level. Manual multi-level management is the fastest way to make double-modification mistakes that move stops in the wrong direction during fast moves. Always use a tool that bitmask-tracks which levels have already fired per ticket.

    The “Mental Breakeven” Trap

    Some traders avoid moving stops at all and instead use a “mental breakeven” — they tell themselves they will close the trade manually if price comes back to entry. This sounds disciplined. It is not.

    In practice, mental breakeven fails three ways:

    1. You are not watching when it matters. The reversal happens during your sleep, your meeting, your lunch — the exact moment you cannot react.
    2. You hesitate when you are watching. Price comes back to entry and you think “let me give it a few more pips.” That is how mental breakevens become 1R losses.
    3. It defeats the purpose of automation. If you have to babysit the trade, you have just downgraded a position-sizing system into a discretionary trade.

    If you are going to use breakeven at all, it has to be a hard stop attached to the position by the broker. Mental discipline is not the bottleneck — execution speed is.

    Putting It All Together

    A practical decision framework:

    • Scalping or news trading? Single-level BE at 0.5R-1R with a 2-5 pip offset.
    • Intraday trend following? Multi-level BE at 1R / 2R / 3R, paired with a trailing stop after level 3.
    • Higher-timeframe swing? Skip BE entirely, use ATR-based trailing from 2R onward.
    • Prop firm challenge phase? Aggressive BE at 1R, prioritize pass over profit maximization.
    • Live funded account? Match your live BE rules to whatever you backtested. Do not “tighten up” because the money is real.

    The point is: breakeven is a strategy-specific tool, not a universal best practice. Backtest it explicitly against your strategy. If turning it on improves your equity curve, use it. If turning it on flattens your big winners, leave it off.

    Making It Automatic

    All of the above only works if breakeven is enforced automatically. Manual breakeven management is the source of the three failure modes above — missed moves, hesitation, and accidental double-modification.

    RiskFlow Pro handles single-level and multi-level breakeven automatically, with configurable trigger R, offset in pips, and per-ticket bitmask tracking so each level only fires once. The same dashboard manages partial close at progressive R-multiples, so you can stage profit protection alongside breakeven moves without any manual intervention.

    For the full breakdown of how multi-level breakeven, partial close, and ATR trailing combine in real trade scenarios — including specific FTMO setups — the Advanced Features guide walks through each combination with concrete examples on Gold, EURUSD, and US30.

    Key Takeaways

    • Breakeven is not free — it trades drawdown protection for expected value. The right setting depends on your strategy.
    • Move early (0.5R-1R) for scalping, news trading, and prop firm challenges where capping risk matters more than catching runners.
    • Move late or skip entirely for trend-following, breakout, and swing strategies where 5R+ winners pay for losers.
    • Always use an offset in pips to cover spread and commission — “exact entry” breakeven is actually a small loss every time.
    • Multi-level breakeven (1R, 2R, 3R) outperforms single-level for most intraday strategies — but only if executed automatically.
    • Mental breakeven is not breakeven. If it is not enforced by the broker, it does not exist.

    Get RiskFlow Pro

    Multi-level breakeven, automatic, on every trade.

    Stage your stops at 1R, 2R, 3R with configurable offsets — and pair with partial close at the same levels.

    Download Free on MQL5 →

    For multi-level setups, partial close pairing, and FTMO-specific configs see the Advanced Features Guide.

  • RiskFlow Pro Advanced Features: Every Tab Explained with Real Trading Examples

    RiskFlow Pro Advanced Features: Every Tab Explained with Real Trading Examples

    Advanced Guide · MT5 · Deep Dive · 15 min read

    You have RiskFlow Pro attached to your chart and you know how to size a trade and place it. Now you want to go deeper. This guide walks through every tab, every feature, and exactly when each one earns its keep in real trading.

    If you have not installed RiskFlow Pro yet or you are still getting your first trade placed, start with the Quick Start Guide first — it gets you from zero to your first trade in under 5 minutes, then come back here.

    What You Will Learn

    The four trailing stop modes, partial close triggers, split-entry strategies, OCO pending orders, virtual SL/TP stealth mode, the complete Protect tab for prop firm challenges, multi-symbol monitoring, hotkeys, and the trade journal. Everything with concrete examples you can copy.

    Manage Tab — The Heart of RiskFlow Pro

    This is where most of your edge comes from. The Manage tab turns you from a trader who places orders into a trader who systematically manages them.

    Breakeven — The One You Should Always Use

    You already know this one from the Quick Start guide. Toggle BE ON, set Trigger R to 1.0, set Offset pips to 2.0. That is 90% of traders sorted.

    Pro tip: for scalping (trades that last minutes), drop Trigger R to 0.5. For swing trades (trades that last days), bump it up to 1.5 to give the trade room to breathe before locking in.

    Partial Close — Bank Profit While Letting Winners Run

    The setup: Partial Close triggers at a specific R multiple and closes a percentage of your position. The field value is R multiples, not a percentage.

    Typical setup that works well for most strategies:

    • Close at R: 1.0 — closes at 1R profit
    • Close %: 50 — takes half off the table

    Pair this with Breakeven and something magical happens: when price hits 1R, you bank 50% profit AND your SL moves to entry. The remaining 50% of the position is now a risk-free runner heading toward your TP. This is the single highest-edge combo in retail trading.

    Trailing Stops — Four Modes, Know When to Use Which

    RiskFlow Pro offers four trailing methods. Cycle through them using the Trail Mode button.

    1. ATR Trailing — Uses Average True Range to set a dynamic distance from current price. Best for trending markets where volatility varies. Settings: Period 14, Multiplier 2.0-2.5. Tighter multipliers lock in faster but get stopped out on normal retracements.

    2. Pips Trailing — Fixed distance in pips. Best when you know the instrument’s typical retracement depth. For gold scalping, try 150250 pips. For EURUSD intraday, 2030 pips.

    3. Percent Trailing — Trails at a % distance from entry. Best for long-term holds where you want the stop to scale with the move.

    4. MA Trailing — Uses a moving average as the trailing stop line. Best for trend-following where you want to stay in as long as price is above/below MA. Cycle through period options: 20, 50, 100, 200.

    Common Mistake

    Do not enable Breakeven AND Trailing at the same time. They fight each other. Use Breakeven only, OR Trailing only. For most traders, Breakeven + Partial Close is the strongest combo.

    Split Entry — Distribute Risk Across Multiple Positions

    Set Split to 2 through 5. Your calculated lot size is divided across that many positions, all sharing the same SL and TP.

    Why bother? Two reasons. First, it lets you scale out at multiple TPs manually (close position 1 at 1R, position 2 at 2R, let position 3 run). Second, some brokers give better fills on smaller lot sizes. On prop firm accounts, this can also help with position size limits.

    Protect Tab — Prop Firm Lifesaver

    If you are running an FTMO challenge, MyForexFunds, The Funded Trader, or any other prop firm evaluation, this tab is what keeps you in the challenge instead of violating drawdown rules.

    Daily DD Limit

    Cycle through four DD calculation methods via the DD Type button:

    • FTMO Rel — FTMO’s relative method (balance at 00:00 CE(S)T). Use this for FTMO.
    • FTMO Abs — Absolute drawdown from starting balance.
    • % Balance — Generic percentage of current balance.
    • % Equity — Generic percentage of current equity.

    For FTMO specifically, enter 4.5 instead of exactly 5.0. That 0.5% buffer protects you from slippage, spread widening, and timing mismatches between your broker time and CE(S)T.

    Floor Line on Chart

    When Daily DD Limit is ON, RiskFlow Pro draws a horizontal line on your chart showing the exact equity level where your daily limit triggers. Psychologically, seeing this line is huge — it stops you from overtrading because you can see exactly how much room you have left.

    Max Spread & Slippage

    Two protection settings below the DD limit:

    • Max Spread — Blocks new orders when spread is above this value in points. Set to 30 for most majors, 50-100 for gold.
    • Max Slippage — Rejects orders that slip beyond this many points. Protects you during news events.

    Want push or email alerts when the daily DD limit triggers, a Partial Close fires, or your Stop Loss moves to breakeven? The MT5 notifications setup guide walks through the full configuration — push to your phone, email via SMTP, and which events are worth turning on.

    Pending Orders — OCO and Trailing Entries

    Place a pending order the usual way (entry price not at market), and RiskFlow Pro shows extra options.

    OCO (One Cancels the Other)

    Toggle OCO ON before placing two opposing pendings (e.g., Buy Stop above and Sell Stop below a range). When one triggers, the other is automatically cancelled. Perfect for breakout trading when you do not know direction but will trade the break either way.

    Pending Trailing

    Turns your pending order into a chase. As price moves in the direction of your pending entry, the pending order moves with it at a fixed distance. Useful when you want to catch a pullback entry but the price keeps trending. Set Trail Points to match typical retracement depth.

    Virtual SL/TP — Stealth Mode

    Toggle Virtual SL/TP ON. The SL and TP are tracked by the EA locally and sent as market orders when triggered, instead of sitting on the broker’s server. Benefits:

    • Brokers cannot see your stops (protects against stop hunting on some brokers)
    • Works around broker SL distance restrictions
    • Reduces “stop hunt” style false triggers from spike candles

    Important

    Virtual SL/TP only works while MT5 is running. If your VPS or MT5 terminal closes, there is no safety net. Use real SL/TP on your broker account as the master, and Virtual only as a secondary layer.

    Session Tab — Trade Only When Your Edge Exists

    Every instrument has hours when it moves and hours when it chops. Session filter blocks new trades outside your defined windows.

    The tab shows four preset sessions: Sydney, Tokyo, London, New York. You can customize each one’s open and close time in GMT. Toggle Session Filter ON and only the sessions you enable will allow new orders.

    Recommended filters by instrument:

    • Gold (XAUUSD): London + New York — the overlap (13:00-16:00 GMT) is the highest-edge window
    • EURUSD: London + NY open — avoid Asian session chop
    • USDJPY: Tokyo + London — avoid thin NY afternoon
    • US30 / Nasdaq: NY only — the indices barely move outside US hours

    Monitor — Track Positions Across All Charts

    Press the MON button (or hotkey M) to open the multi-symbol monitor window. You will see every open position RiskFlow Pro manages across all your charts — not just the current one.

    For each position: symbol, direction, lots, entry, current P&L, and time open. You can close any position directly from the Monitor without switching charts. If you trade 3-5 instruments simultaneously, this saves you serious clicking.

    Journal Tab — Your Trading History, Automated

    The Journal tab logs every trade RiskFlow Pro places: entry, exit, R multiple, duration, and your optional notes. No more manually tracking trades in a spreadsheet.

    Two things to do regularly:

    1. Export to CSV weekly. Click the Export button on the Journal tab. Open in Excel or Google Sheets and filter by R multiple. Your biggest insights come from seeing which setups actually hit 2R+ vs which ones chop around 0.5R.
    2. Add notes in the Trade tab before pressing BUY/SELL. Even a 3-word tag like “NY open pullback” gives you filterable categories for review later.

    Hotkeys — Trade Without Clicking

    Click the chart once to give it focus, then:

    • B — Buy (uses current SL/TP from dashboard)
    • S — Sell
    • X — Close all positions on this symbol
    • C — Calculate (recalc lot size from current SL)
    • L — Toggle Lines mode (draggable Entry/SL/TP)
    • M — Toggle Monitor window

    Once you get used to Lines mode + hotkeys, your workflow becomes: drag SL line to where you want risk, drag TP line to target, glance at lot size on dashboard, press B or S. Entire trade entry in under 3 seconds.

    Settings Tab — One-Time Configuration

    You set this up once and forget it. Worth reviewing anyway:

    • Risk Type — % Balance is the most common. % Equity adjusts as you rack up floating profit. Fixed $ locks risk to a dollar amount regardless of balance changes.
    • Value — Most retail traders should sit at 0.5-1% per trade. Above 2% starts compounding losses dangerously fast.
    • R:R Ratio — 2.0 is the default. Higher if your strategy has low win rate (breakouts), lower if high win rate (mean reversion).
    • Server time bar — Shows broker time (with UTC offset) and CE(S)T time. Critical for FTMO since DD resets at CE(S)T midnight, not your broker’s midnight.

    Putting It All Together — Three Real Setups

    Setup 1: FTMO Gold Scalper

    • Risk Type: % Balance, Value: 0.5%
    • R:R: 2.0
    • Manage: Breakeven ON (Trigger 1R, Offset 5 pips), Partial Close ON (Close at 1R, Close 50%)
    • Protect: Daily DD ON, Type FTMO Rel, Limit 4.5%, Max Spread 50 pts
    • Session: London + NY only

    Setup 2: Swing EURUSD Breakout

    • Risk Type: % Balance, Value: 1.0%
    • R:R: 3.0
    • Pending orders: OCO ON (Buy Stop above resistance, Sell Stop below support)
    • Manage: ATR Trailing ON (Period 14, Mult 2.5), Breakeven OFF
    • Session: filter OFF (swing trades span sessions)

    Setup 3: Multi-Instrument Trend Follower

    • Risk Type: % Equity, Value: 0.75%
    • R:R: leave blank, manage exit manually
    • Manage: MA Trailing ON (MA 50), Breakeven OFF
    • Split Entry: 3 (distribute across three positions)
    • Monitor: always on, so you can close any position from any chart

    A Final Note on Discipline

    RiskFlow Pro is a tool, not a strategy. It cannot tell you when to trade or which direction. What it does is remove the excuses: “I forgot to move my stop,” “I took too much risk,” “I kept trading after hitting my daily limit.” Those excuses are what kill most traders. Setting up RiskFlow Pro correctly is setting up a system where those excuses are impossible.

    Pick one of the three setups above that matches your style, dial in the settings once, and let the EA do its job for a month. Then export your journal to CSV and review. The data will tell you which parts of your trading need work.

    Get RiskFlow Pro

    Free for the First 500 Downloads

    Every feature in this guide, in one compact dashboard on your MT5 chart. Position sizing, trade management, prop firm protection, and a built-in journal.

    Download Free on MQL5 →

    Works on any MT5 broker account · No registration on our site required

    New to RiskFlow Pro? Start with the Quick Start Guide — get your first trade placed in under 5 minutes, then come back here for the deep dive.

    Questions or requests for new features? Leave a comment on the MQL5 product page — that is where I actually read and respond.

  • RiskFlow Pro Quick Start: Your First Trade in Under 5 Minutes

    RiskFlow Pro Quick Start: Your First Trade in Under 5 Minutes

    Tutorial · MT5 · Free Tools · 8 min read

    You just downloaded RiskFlow Pro from MQL5. Maybe you are tired of opening Excel every time you want to calculate lot size. Maybe you blew a prop firm challenge last week because you forgot to move your stop to breakeven. Maybe you just want a cleaner way to trade manually.

    Whatever brought you here, this guide gets you from zero to your first properly-sized trade in under 5 minutes. No fluff, no backstory on why risk management matters. Let us just get the thing running.

    What You Will Have By The End

    A working RiskFlow Pro dashboard on your chart, your personal risk settings dialed in, and one practice trade placed correctly with a calculated lot size.

    Before You Start

    Make sure you have these three things ready:

    • MetaTrader 5 installed and logged into a broker account. A demo account works fine for practice.
    • RiskFlow Pro downloaded from the MQL5 Market. If you have not downloaded it yet, grab it at the link at the bottom of this article.
    • Algo Trading enabled in MT5. Check the top toolbar — the Algo Trading button should be green, not red.

    Step 1 — Attach RiskFlow Pro to a Chart

    1. Open any chart you want to trade on. Gold, EURUSD, US30, whatever you usually trade. The timeframe does not matter — the EA works on any timeframe.
    2. In the MT5 Navigator panel (left side), expand the Expert Advisors folder. You will see RiskFlow Pro there.
    3. Drag RiskFlow Pro onto your chart. A settings window will pop up.
    4. In that window, make sure Allow Algo Trading is checked. You do not need to check Allow modification of Signals settings — that is unrelated.
    5. Click OK.

    You should now see a dashboard appear in the top-left corner of your chart. Six tabs across the top: Trade, Manage, Session, Protect, Settings, and Journal. The smiley face in the top-right corner of MT5 should be there too, confirming the EA is running.

    Troubleshooting

    If you do not see the dashboard, check that Algo Trading is actually enabled (the button in the MT5 toolbar should be green). If the dashboard shows but looks cut off, drag it to a less crowded part of your chart.

    Step 2 — Set Your Risk Profile

    This is the most important step. You only need to do it once, then the EA remembers.

    1. Click the Settings tab on the dashboard.
    2. You will see a Risk Type button at the top. Click it to cycle through four options:
      • % Balance — Risk a percentage of your total account balance. Most common choice.
      • % Equity — Risk a percentage of current equity. Useful with many open positions.
      • Fixed $ — Risk a fixed dollar amount every trade.
      • % Free Margin — Risk a percentage of available margin.
    3. In the Value field, enter your number. For example, if you chose % Balance and want to risk 1% per trade, type 1.0.
    4. Set your R:R Ratio. This is how RiskFlow Pro auto-calculates your take profit. For example, 2.0 means your take profit will be set at 2x your risk distance. Leave blank if you prefer to set TP manually.

    That is it for setup. The EA now knows exactly how to size every trade you make going forward.

    Step 3 — Place Your First Trade

    Go back to the Trade tab. You have two ways to enter a trade — pick the one that fits your style.

    Method A: The Simple Way (Market Order)

    1. Click the MARKET button. It turns green.
    2. In the SL field, type your stop loss price. For example, if gold is at 2650 and you want to stop out at 2645, type 2645.00.
    3. Leave TP blank (RiskFlow Pro will auto-calculate from your R:R ratio) or type a specific TP price.
    4. Look at the Lot display. It shows the exact lot size calculated from your risk settings and SL distance. Also check Margin — green means you have enough, red means your risk setting is too high for your account.
    5. Click BUY or SELL. Order goes through at market price.

    Method B: The Visual Way (Drag Lines)

    This is where RiskFlow Pro shines. If you have ever wanted to just drag your SL and TP around on the chart and see your lot size update live, this is for you.

    1. Click the LINES button. It turns green.
    2. Three colored lines appear on your chart: blue (Entry), red dashed (Stop Loss), green dashed (Take Profit).
    3. Drag any line to the level you want. The dashboard updates everything in real time — lot size, R:R ratio, margin, and order type.
    4. When you like what you see, click BUY or SELL.

    That is your first properly-sized trade. The blue, red, and green lines stay on your chart until the position closes, so you always know your levels at a glance.

    Step 4 — Let the EA Manage the Trade

    This is the part most traders skip, and it is also the part that separates profitable traders from the rest. Click the Manage tab.

    For your first trade, turn on just one thing: Breakeven.

    1. Toggle the BE button to ON. It turns green.
    2. Set Trigger R to 1.0. This means when price moves 1x your risk distance in your favor, the EA will move your stop loss to your entry price automatically.
    3. Set Offset pips to 2.0. This adds a small buffer so your stop sits just above (or below) entry — making breakeven actually a small profit to cover spread.

    Now walk away. When the trade works out, your stop moves to breakeven automatically. When it does not, your original SL protects you.

    Why This Matters

    This one setting alone will change your trading. No more “I should have moved my stop” regrets after a winner turns into a loser.

    Step 5 — Bonus: Turn On Prop Firm Protection

    If you are running an FTMO or other prop firm challenge, this takes 30 seconds and can save your entire account.

    1. Click the Protect tab.
    2. Toggle Daily DD Limit to ON.
    3. Click the DD Type button and set it to FTMO Rel (or whichever method your prop firm uses).
    4. Set the limit value. For FTMO, enter 4.0 for the 4% daily drawdown limit, or 4.5 if you want a small buffer.

    Done. The EA now watches your equity every tick. If you ever get close to the daily drawdown limit, new trades are blocked automatically. The floor line even shows you how much you have left to lose before the limit triggers.

    What to Do Next

    You have the basics working. That alone already makes you faster and safer than 80% of manual traders.

    If you want to go deeper — trailing stops, partial closes at multiple levels, OCO pending orders, virtual SL/TP stealth mode, and the full trade journal — the Advanced Features guide covers every tab in detail with real trading examples.

    Want alerts pushed to your phone when trades hit breakeven or your daily drawdown limit triggers? The MT5 notifications setup guide walks through push and email alerts end to end.

    Get RiskFlow Pro

    Free for the First 500 Downloads

    A professional manual trading dashboard. Position sizing, trade management, and FTMO risk protection — all in one compact panel on your chart.

    Download Free on MQL5 →

    Works on any MT5 broker account · No registration on our site required

    Found this guide useful? Leave a rating or comment on MQL5 — it helps other traders discover RiskFlow Pro, and helps me prioritize which features to add next.